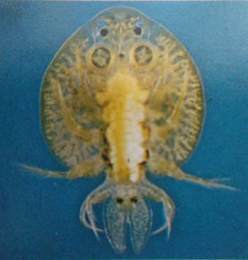
Home Blog Page 11

How to Treat Yellow or Brown Aquarium Water

0

Aquarium water is normally clear and colorless, but from time to time it can become cloudy or tinted. Unexpected yellow or brownish colored water is usually a sign of trouble, although there are cases when it is not a problem. To ensure that your aquarium habitat is safe for your fish, investigate yellow or brown water promptly to determine the root cause so you can correct it if needed.

Bacteria

Bacteria overgrowth, often referred to as bacterial blossom or bloom, will cause cloudiness. The water may appear to be gray or milky, but bacteria do not tint the water yellow, brown, or even green. Anytime the water takes on a distinctly yellow or brown tint, the problem is dissolved organic material rather than bacteria, so you can rule out bacterial blossom as the root cause.

Keep in mind that there can be multiple issues going on at the same time. If you have tinted water that is also very cloudy rather that clear, you may have a couple of different issues to contend with.

Dissolved Organic Compounds

Tinted or cloudy water is often caused by dissolved organic compounds, but what does that mean? Dissolved organic compounds are the organic matter that has broken down in the water. It could be fish waste, uneaten food that has decayed, decaying plant parts, or even a dead, decomposing fish parts.

All of these sources can result in organic compounds that dissolve in the water, which can change its makeup. These compounds ultimately impact the health of your fish. Over time, these compounds will contribute to changes in the water chemistry that are harmful to the fish. Dissolved organic compounds will also give rise to unpleasant odors and make the aquarium look less attractive.

Tannins

The presence of tannins is one cause of brown or yellow water that is usually not a problem. Tannins are present in driftwood, and over time they will leach into the aquarium water, staining it yellow to brown. Tannins lower the pH of the water and soften it. For some fish, this may be desirable and even recommended. This is particularly true of fish from South America that requires soft acidic water to thrive and promote spawning.

Troubleshooting Steps

A few indicators can provide clues as to the root cause of water discoloration and resolving the problem.

The first step is to test the water and determine the pH, ammonia, nitrite, and nitrate levels. Also, examine the tank carefully. Do you notice a lot of debris? Are there dead plants, uneaten food on the substrate, perhaps even a missing fish that might be hidden somewhere and decomposing? Do you have any driftwood in the tank? Is the filter running normally? Does the water have foam on the surface? If you take some water and put it in a closed container and shake it, does it produce foam? Foam is an indicator of protein wastes in the water.

illustration of causes and fixes of brown or yellow aquarium water
Illustration: Nusha Ashjaee. © The Spruce, 2018

Fixing the Water Discoloration

Once you have completed your tests and observations, you can determine the next course of action.

  • Tannins: An acidic pH along with driftwood in the tank is a strong indicator that tannins have leached from the driftwood. This is not a problem unless you are keeping fish that require a significantly higher pH. If driftwood is the cause, the tinted water will clear over time, as the tannins in the driftwood will eventually deplete. If you keep fish that require an alkaline pH, consider changing your aquarium decor to something that will not lower the pH.
  • Biologicals: If the ammonia or nitrite levels are elevated, then the biologicals or natural bacteria in the tank are not stabilized sufficiently to keep toxins in check. Because both ammonia and nitrite are potentially lethal to fish, take steps immediately to lower them. Your quickest course of action is to do a large water change. A 50 percent water change will dilute the concentration of toxins in your aquarium by roughly half. You should test for ammonia and nitrites after the water change.
  • Organics: If the tank has lots of uneaten food, decayed plants, or possibly a dead fish, it needs cleanup. Likewise, if the water is foamy or foams when shaken, there are a lot of dissolved organics in the water. Clean things up by removing all decaying material such as uneaten food, dead plants, or a fish corpse. Vacuum the gravel and make sure the filter is running at a normal output. If the filter is slow, odds are it’s clogged with debris, which is another potential source of organics.

Do Not Clean Out the Entire Tank

Even if your tank is really dirty, do not clean everything on the same day. Stagger the cleaning regimen to give the fish a chance to adjust to the changes. It will also give your biological colonies a chance to recover as well. If you disrupt the filter and gravel bed at the same time, you could make things worse instead of better. Do one, wait a week, and then do the other.

It may take some time to clear up the water, but eventually, it will resolve. Continue a regimen of regular maintenance and the problem is not likely to recur.

How to breed Zebrafish

0

Water chemistry: Zebera danios are very tolerant of water conditions and temperature. For breeding purposes, we will go with a PH of 6.6 – 6.8, temperature of 78-82 degrees F.

Sexing Zebrafish: Zebra fish are easy to sex if you know what to look for. The males are more streamlined in appearance that the females and the females have a more compressed looking body, not to mention the extra girth that they have at their abdomen when loaded with eggs after conditioning. Take a look at the picture at the top left of this article. The Zebra in the picture on top is a male. The one below is a female. Study the shape of these two fish for a while and you’ll get it. Piece of cake!

Selecting and conditioning the breeders: Place about a dozen mature (about the size of 1 1/2 inches) Zebrafish in a 10 gallon or larger aquarium. Make the PH 7.0 or neutral at this point and temperature at 72-74 degrees F.(We will lower the PH and raise the temperature when we are ready to breed them.)

For conditioning, feed them a variety of frozen and flake food 3-5 times a day until you see that the females load up with eggs and can surely tell males from females. This should take 2-3 weeks.

Setting up the breeding tank: For breeding purposes we will need a 5 1/2 gallon tank, 25 watt submersible heater, air stone supplied with air from a vibrator pump (we won’t set up the air stone until the fish have laid eggs) and enough marbles to place on the bottom of the tank to a depth of 2 1/2 inches deep across the whole tank bed.

Fill the 5 1/2 gallon tank with a water line about 2 – 2 1/2 inches higher than the marble substrate. Set the PH at 6.6 with a water temperature of 78 degrees F. Keep it there!

Now we will get these baby’s to breed! Since Zebra fish breed in schools, select two or three trios of breeders, 2 males to one egg rich female. Having this ratio of males to females will ensure the fertilization of the eggs and stimulate the breeding process by males and females ready to spawn turning on the other breeders to spawn.

Once in the breeding tank if properly conditioned, the fish should breed within a few days. If they don’t, raise the temperature a few degrees to 80 degrees F and change 5% of the water. Wait another day, change another 5% of the water and raise the temperature to 82 degrees. The third day and there after just do the 5% water change.

Keep feeding them 4-5 times a day until they spawn.

The mating process: Once the fish are in breeding mode, the whole school spawns! The eggs are dropped by the females and the males fertilize them as they drop. Where do they drop? Into the marbles baby! Since Zebrafish will consume there on eggs while breeding, the marbles and the low water line are there to prevent them from doing so. The eggs will drop down through the marbles, bouncing their way down to the bottom of the tank off the marbles where the adult breeders can’t get them.

You have eggs, now what? Once they start breeding it only takes an hour or so for the females to noticeably look thin and streamlined due to dropping their eggs. No rush to pull the breeders out for a few hours, the eggs are protected by the layer of marbles.

Once you are satisfied that the fish are done breeding and the females have no more eggs, net the breeders out and place them back into the conditioning tank, place an airstone in the tank set to slow bubble and 2 drops per gallon of methlene blue or acraflavin fungicide.

It will take about 10 days for the eggs to hatch and fry to become free swimming. They will find there way through the marbles on their own so just watch and wait. When you see them swimming around, add 1/2 quart of water a day of same quality and temperature to the tank to a normal 5 1/2 gallon water level. This will take a few days. When you reach the right water level, add a sponge filter. Change no more than 5% water a day to keep things fresh.

Feeding the fry: For a few days after the fry become free swimming, they won’t need to be fed. They are supplied by nature with an egg sack of which they derive nourishment for a few days to get a head start in life. When the egg sack in the belly region disappears, it’s dinner time!

Zebra Danio fry are too small to eat any kind of commercial fish food, there mouths are too small. Then what do they eat? Microscopic live organisms or Infusoria. You can buy Infusoria tablets at your aquarium shop. You just drop a tablet in the tank and in a few hours, your tank will be infested with live microscopic live fish food for the fry. I would pop a few of these tabs in the tank while the fry still have their egg sacks. Buy the time they are ready to eat, they got food! Another thing you could do is place a 2×2 inch piece of lettuce in the tank at the egg sack stage. This will also produce live food for the fry. In about two weeks time they will be ready to eat live or frozen baby brine shrimp and fine flake food.

Raising the fry: Wait about a month after the free swimming stage, then transfer them into a 20 gallon rearing tank. Feed them everything!

How to Culture Infusoria

0

Infusoria are microscopic live organisms that must be available for egg laying fish that are too small to feed on baby Brine shrimp.

How to obtain infusoria

CULTURING INFUSORIA Home culturing of... - Betta Hobbyist Cebu ...

To obtain infusoria, you take a handful of hay or dry leaves and place it into a jar, fill the jar with water from your tank or a pool of water. Leave in the sun for a few days. When the water just starts to get cloudy large unicellulars have sufficient bacteria to feed upon. Once the water begins to clear again, an appropriate culture is available. You can then extract these creatures, with a turkey baster, for example, for feeding to your fry.

To keep infusoria on a continual basis at home, use a mixture of at least two to three of these ingredients: hay, dry leaves, grass blades, vegetable leaves, stalks, or cucumber skin. Add water to let them ferment in an ice-cream tub, which is flatter and provides a larger surface for oxygen to enter the water than a jar. Expose to indirect sunlight. Depending on room temperature, bacteria will thrive during the first three to five days (faster in warmer temperature). The fermenting liquid will give out an unpleasant odor and cloud the water. This liquid should not be fed to fish fry because it contains a high concentration of amonia (or acid if your raw materials contains too much starch) and the bacteria it contains are too small for the fry.

After the initial three to five days, pour 1/3 of the water into a second, smaller, flat, container. Do this twice a day, because fish fry will benefit from frequent but small helpings. Top up the tub with non-chlorinated water (tap water left to stand overnight will do). Add fresh leaves or vegetable scraps every three days. Harvesting should be done regularly, such as on a daily basis, to prevent overcrowding of microorganism that can result in the collapse of the culture.

Dilute the fermented liquid in the second container with another 30% to 50% non-chlorinated water. The liquid at this stage will still smell earthened and unpleasant, but not pungent with amonia. Unicellulars should bloom and peak within 12 to 24 hours. Some of these single cell creatures may be visible as small, mobile, dots by the naked eyes against a dark background and if bright light is shone from the side, which makes an interesting science project. For example, you can place a clear plastic container on black paper upon window sill, then wait a few minutes for any debris to settle before viewing. The microorganism may congregate near the water surface for oxygen and you need to use only the top 2/3 of the water. A kitchen sieve should catch any debris while allowing the unicellulars to drain into your fry nursery tank. The tank should be weakly aerated to prevent algae scum feeding on the nutrient-rich water from accumulating at the water surface and blocking off oxygen.

How to hatch Brine Shrimp

0

Let us examine what brine shrimp are, where they are found and harvested.

Brine shrimp are naturally found in lakes that are of very high salt content like the Great Salt Lake in Utah. Most of the adult brine shrimp sold as frozen shrimp or packaged as eggs are harvested there. San Francisco also harvests a similar specie of shrimp but in my experience they are of a smaller type. This article will refer to the eggs obtained from the Great Salt Lake.

Brine shrimp hatchery

There are several methods to hatching brine shrimp, too many to cover them all. I will explain the method I have been using for many years. You can easily adapt the container size or amount of containers for your particular need. Many fish breeders use one gallon pickle jars or cones that are made from glass or Plexiglas. I have been using 2 liter plastic soda bottles for several years now and find them to be easiest. Soda bottles are correctly shaped for shrimp hatching when turned upside down. This creates a funnel or cone shape that helps keep the hatching eggs in constant motion. Cutting of the bottom of the soda bottle is necessary for ease of cleaning. As you can see from the photo I use the plastic carton from the 2 liter soda bottles as a holder for my hatching containers. If smaller or larger bottles are to be used you will need to either make a base or construct a holder to keep the bottles stationary. I also use airline pipe valves drilled into the bottle caps for my air supply. If you decide to use this method make sure to place air line check valves below the containers to avoid draining the container if the air supply is stopped. You can also use rigid tubing attached to your airline and weighted down or clipped to the soda bottle to keep it in place. DO NOT use an air stone to aerate the water as it will create a heavy foam.

So we now have our hatching containers and air supply .A good quality brine shrimp net is also needed. Most better pet shops carry them. What could be added is a light source that is kept near the containers at all times. This will help in the hatching time and will also assist in separating the live shrimp from the spent shells when hatching is completed. Hatching times will vary due to the temperature of the hatch and the quality or source of the eggs. I have learned never to purchase eggs from the local pet shops as these eggs have probably been on the shelf for some time. Mail order suppliers are a good source for purchasing eggs and some brands are better then others. Over the past few years due to world wide use of Utah eggs, El Nino, poor harvests or just plain poor harvesting has plagued the tropical fish industry. Prices have risen, fallen and today have risen again. All in all baby brine shrimp is still the best source for high quality fish food for livebearer fry and juveniles. Few show specimens are ever raised without being fed live baby brine as a first food.

There are several recipes for preparing the hatching solution. I will discuss some of the older formulas first. Kosher salt or non-iodized salt is used at the rate of 4 tablespoons per gallon of water. A ½ teaspoon of either Borax or baking soda is also added to help soften the egg shells. What is important is that a specific gravity between 1.020 -1.025. Although lower gravity works, better hatches are obtained in this range. I have been using sea salt by itself for several years and the hatches are very good. It may be a bit more of an expense for the sea salt but the hatches remain very consistent. Adding some PH Up or baking soda will also increase your hatch. For a two liter bottle filled a little more then ¾ with water I use between 1 ½ – 2 tablespoons of sea salt. I do not add the shrimp eggs until all the salt is completely dissolved. The amount of tanks and or fish will determine how much brine shrimp eggs you will use in each container. I suggest no more then ¼ teaspoon for a small setup and 1 -2 teaspoons for 50 tanks or more. If you cannot use all the shrimp when hatched I suggest placing the unused portion in the refrigerator to be used later that same day. Baby brine shrimp is best fed to your fish about ½ hour to one hour after feeding dried food. The reason is that the dried food will still be in the fishes digestive system and the shrimp when fed will not become digested too quickly. I have no actual proof of this happening but the bellies of my fry seem fuller when fed this way.

Hatching time varies as I have said due to egg quality but temperature will play an important role in hatching time and hatch size. I try to maintain my hatching containers at about 80 degrees which gives me a good hatch between 24 to 36 hours. This is something you will need to experiment with. When you feel the hatch is ready you can either remove or shut of the air supply. I pour my hatch (I use two 2 liter bottles) into a large glass pickle jar which I keep slightly tilted on one side. Allow the hatch to sit for about ten minutes. All the hatched shrimp will collect near the bottom of the jar. If the light source is situated near the jar or container the shrimp will become attracted to the light and will make their removal easier. I use a siphon hose slightly larger then normal air tubing to remove the shrimp. I fill the hose with water and place my finger at one end keeping it lower then the container as I insert the other end into the container. Once the end is at the bottom of the container I release my finger and drain the shrimp into a plastic container. Make sure you stop the siphon before the container is emptied to avoid draining the spent egg shells. I then pour the shrimp into my shrimp net. It is important to rinse the shrimp while in the net under cool fresh water. Next you will turn the net over and with the aid of some running water rinse the net again so the shrimp wash off and are collected into a small container. There are several methods to fed the shrimp but using a turkey baster makes the job quick and easy. Another way to fed the shrimp is by using a mustard type squeeze bottle. I have found semi-clear bottles to be easier than the old turkey baster. After feeding all your fish, babies first, rinse everything off and allow to dry until the next use.

How to change water in your Aquarium

0

Even when your aquarium water looks clear, if you stir up the substrate a bit, you may be shocked at how much detritus is present. When fish are fed, particles of food fall to the bottom where they decay. Meanwhile, the food that is eaten is eventually released back into the water as urine or feces, which also adds to the problem of poor water quality. Eventually, these wastes accumulate in the aquarium, both as solid debris in the gravel and as dissolved chemicals such as nitrate and phosphate.

And yet, waste products are not the only reason water needs to be changed. Trace elements and minerals in the water are important both to the stability of the water chemistry and to your fish. Over time, trace elements are either used up or filtered out; if they are not replaced by water changes, the pH of the water will drop. Furthermore, a lack of trace minerals will adversely affect the vigor and health of the fish as well as the biofilter bacteria that remove ammonia from the water. Giving your fish new water regularly is much the same as giving them vitamins and minerals to keep them strong and healthy.

Nitrate and Phosphate Waste

In addition to the debris you can see, other invisible natural waste byproducts called nitrate and phosphate will build up. These put chronic stress on the fish, making them more vulnerable to disease. Elevated nitrate also stunts the growth of young fish and interferes with normal reproduction in adult fish. Nitrate and phosphate also promote the overgrowth of algae; having the effect of fertilizers. Changing the water is the best way to keep nitrate and phosphate levels low.

Frequency of Water Changes

Water changes should be part of regular aquarium maintenance, but the frequency can vary somewhat, depending on size of aquarium and the number of fish. Smaller, heavily stocked tanks will require more frequent water changes than larger, sparsely stocked aquariums.

A good rule is to change 10 to 15 percent of the water each week. If your tank is heavily stocked, bump that up to 20 percent each week. A lightly stocked aquarium can maybe get by for two to four weeks, but this should be the maximum length of time between water changes.

Topping Off for Evaporation

You might think that adding water to the tank is the same thing as changing the water, but that is not the case. Merely adding water does not remove any of the wastes, so do not skimp on the water changes. Simply topping off the aquarium water as it evaporates puts fish at risk of poor health.When you see the water level has dropped, go ahead and use a gravel vacuum to clean the aquarium gravel and remove more water, then add fresh, dechlorinated water to the aquarium to bring it back to the proper level.

illustration of water changes in aquariums

How to feed live food to your fish

0


Your pet fish must eat what you serve them, or face starvation (an option that happens all too often). Although flake food is a good staple diet with balanced vitamins and minerals for fish, the vast majority of freshwater fish would literally jump at the chance to have live or even frozen foods.

Flake Food

Before we dive into the topic of live food, let’s talk about flake foods. Realistically, it’s not possible for most of us to provide a completely balanced diet composed of only fresh and frozen foods. Flake food is accepted by a large number of freshwater fish and contains important nutrients your fish needs to stay healthy. However, not all flake foods are created equal.

The next time you purchase flake food take a good look at the ingredients label on the container. What you’ll find is fishmeal, yeast, shrimp meal, algae meal, plankton, kelp, vitamins, preservatives, and protein fillers such as wheat meal, soybean meal, oatmeal, and brown rice. Those last items are fillers. They are necessary to provide an adequate amount of protein but don’t contain the same nutrients and flavor found in shrimp or other food the wild fish would eat.

Remember that ingredients are listed in order of highest volume first, so look for prepared foods that have fishmeal and seafood high on the ingredient list. Once you select a quality flake food, start looking for ways to supplement those boring flakes with fresh or frozen foods.

Also, vitamins in flake foods have a limited storage life, so you should buy food in a quantity that will be used in about a month. If it will take longer to use up the flake food, try storing it in the refrigerator or even freezer to keep it nutritious longer.

The Tubifex Controversy

Tubifex worms have long been heralded as either the worst or the best live food to feed your fish. They are very nutritious and easy to grow at home but can be purchased at many local fish stores. The controversy comes from the risk of them carrying diseases to your home aquarium

Like earthworms (who eat dirt), tubifex are annelid worms that eat whatever material they are raised in. Brace yourself—most commercially bred tubifex worms are raised in trout pond run-offs, which means they live on fish manure. Needless to say, that makes them potential hotbeds for transmitting bacterial or parasitic infections. Disgusting? Yes! But freshwater fish love tubifex worms and thrive on them if they are cleaned properly. So how can you ensure they are safe to feed your fish?

Start by purchasing your live tubifex worms from a reputable store, then carefully examine the water in which they are kept. It should be clear. If it isn’t, don’t purchase them. When you find clean worms, place them in a large container of dechlorinated water, and 3 to 4 times a day rinse them thoroughly until the water runs clear. Store them in the refrigerator and examine the water each morning. If the water is clear they are clean and can be used to feed your fish. Don’t feed them to your fish until the water is clear, so continue to rinse them as needed.

The quality of tubifex will vary from store to store, so if you locate good ones (worms that clean quickly as opposed to ones who are still fouling the water after many days) make note of the supplier. If you find healthy, clean worms, you can start your own colony of tubifex worms by growing them in an aerated tank with an inch of gravel on the bottom and then add small amounts of vegetables (slices of sweet potato are good) or aquarium plant trimmings for food. As they multiply, siphon or net out the worms to feed to your fish.

Almost as good as feeding live tubifex worms, most pet stores sell frozen or even freeze-dried tubifex worms.

Brine Shrimp

One of the best live foods is Artemia, more commonly known as brine shrimp. If you’ve looked around for live brine shrimp you’ve probably discovered they are a bit pricey, or difficult to find at all. Don’t give up. Most fish shops carry a good selection of frozen brine shrimp. The texture and flavor of brine shrimp will vary based on what they were fed and how they are frozen.

Much like people, fish have distinct preferences when it comes to food. Don’t hesitate to try several brands to find the one your fish likes the best. Regardless of whether you try frozen or live Artemia, you will be surprised to see how voraciously even small fish will consume them.

Many fish stores sell dried brine shrimp eggs, and even kits for hatching and raising live brine shrimp at home. Newly hatched brine shrimp are a perfect starter food for baby fish (fry) of many species. They are relatively easy to grow at home.

Other Live Foods

Shrimp aren’t the only “safe” live food available. Experts consider Daphnia, AKA water fleas, one of the top live food choices. They carry none of the diseases that tubifex do, are an excellent source of nutrition for all fish, and can be raised fairly easily.

Daphnia are not commonly found at fish stores, but local fish clubs can usually supply you with a starter colony. The best part of offering Daphnia is the fact that they can live in the aquarium until the fish eat them. Once your fish have gotten the taste of the “good stuff,” you’ll find yourself searching for an even wider variety of live foods. There are plenty of options. Consider the following:

  • Earthworms
  • Grindal worms
  • Maggots (fly larvae)
  • Microworms
  • Mosquito larvae
  • Vinegar eels
  • White worms
  • Wingless fruit flies

Frozen Alternatives

If live food isn’t available, is too costly, or is too much of a hassle to raise, frozen foods are a good alternative. Brine shrimp is the top-selling frozen food, but you shouldn’t limit your fish to only shrimp (even steak gets boring after a while). There are many other frozen foods available, and some even combine several popular foods into a single mix that fish find very appealing.

Spend a little time in the freezer section of your fish store. You won’t find any Macadamia Nut ice cream, but you will find everything from krill, to kelp, to red algae. Wait, aren’t algae and kelp plants? They sure are. Don’t forget that even meat-eating fish will enjoy plants and vegetables. In fact, some vegetarians, such as the plecostomus and other algae eaters, will also eat meat-containing fish foods.

You can satisfy the vegetarians with frozen kelp, frozen or freeze-dried algae, or bits of fresh Romaine lettuce and spinach. The next time you make a salad, wash the greens well and try feeding a small portion to your fish. You might be surprised to see which ones dig into it. What your mother told you about veggies being good for you holds true for your fish too. Fresh vegetables provide vitamins and roughage often lacking in other fish foods.

Whether it’s live or frozen, animal or vegetable, your fish will enjoy having a variety of foods offered to them. Remember, you are the only chef they have.

What to Feed Koi Fish? Ultimate Guide Koi Fish Feeding

0

What to Feed Koi Fish and What to Avoid?

Koi are omnivores by nature and will eat just about anything in the wild, including algae, plants, and insects. When keeping koi as pets, it’s important to keep their natural diet in mind.

They need a balanced mix of proteins and plants to get the right combination of vitamins and minerals they need to grow, stay healthy, and develop vibrant colors.

What you feed your koi is just as important as what you don’t. Here’s what you should feed them and what you should avoid to prevent any problems in the future.

What Kind of Food to Feed Koi Fish?

Before we get into specifics about what food koi should eat, there’s something else to consider: whether the food sinks or floats.

Each has pros and cons that should be considered before deciding which is best for your fish.

Floating Food

Most koi food available in pet stores is the floating type. It’s commonly used by hobbyists and is readily available. One reason that this food is so popular is that you can watch the fish as they eat, which is one of the most fun parts of keeping koi.

Another great thing about floating koi food is it lets you get a good look at your fish on a regular basis. This makes it really easy to do health checks and gives you a chance to get to know their behavior a little better so it’s easier to determine if something is wrong.

Koi have to come to the surface to eat floating food which gives you an opportunity to visibly check for any injuries and make sure all of your fish are eating. If you spot one that doesn’t have an appetite, it’s much easier to observe them for illness or injury this way.

The downside of floating food is that it can quickly get pulled into the filter or skimmer before your koi get to eat it. If this becomes a problem, you can always turn the pump off during feeding or use a floating feeder.

Sinking Food

The best thing about sinking food is that koi are better at eating food that’s fallen to the bottom of the pond. Their mouths actually face downward and, in nature, they eat worms and other things they find in the mud.

Because this is their preferred way of eating, it’s much more efficient and can have better results. There’s a lot less waste which means that you don’t have to use as much food and there isn’t as much left behind to affect the chemical balance of the water.

The downside, of course, if you don’t get to watch them eat which makes it more difficult to monitor their health and behavior. It’s easy to overlook injuries or miss identifying a fish that isn’t eating well.

What Kind of Food

Koi need a wide variety of nutrients to thrive. The following are the ingredients to look for when choosing food for your koi:

1. Spirulina algae

This blue-green algae naturally grows in hard water with high pH. It’s small and floats freely rather than growing on rocks of branches like other types of algae so it’s easy for koi to get to.

There are a lot of benefits for koi that eat spirulina algae. It improves digestion which helps prevent bloating, boosts the immune system, and results in a higher growth rate.

2. Wheat germ

The germ is essentially the seed of the wheat plant. Wheat germ helps koi grow faster and provides a healthy amount of vitamin E which has a lot of benefits, including improved oxygenation and circulation and a healthy immune system.

Koi need more wheat germ in the cooler months when their metabolism starts to slow down. The fat in wheat germ is easy to digest when and helps them prepare for hibernation.

3. Brine shrimp

We mentioned that koi are omnivores so it’s important that they get enough protein in their diet. Brine shrimp are a great choice because they’re rich in other important nutrients as well.

Brine shrimp is a great choice during periods of high activity. For example, freshly hatched koi need extra protein to fuel growth and adult koi need it in the summer when their metabolism gets faster and they’re very active.

Treats

Just like any pet, koi like treats. Some of their favorite snacks are watermelon, orange slices, broccoli, lettuce, garlic, shrimp, and worms. Keep in mind that these things should only be given as a special treat and in moderation.

What Not to Feed Koi Fish?

Stay away from low-quality koi food because it won’t have the delicate balance of vitamins, minerals, and nutrients that koi need to grow strong and healthy.

You should also avoid giving koi anything that’s very high in carbohydrates like peas, bread, or corn. Not only are these foods hard to digest, but they can also cause health problems if eaten in excess.

When is the Best Time to Feed Koi Fish?

When is the Best Time to Feed Koi Fish?

Because most people keep koi in an outdoor pond, the temperature is a huge factor in when to feed them.

Like a lot of fish, koi are cold-blooded. The temperature of their environment directly affects their metabolism. So, their feeding schedule actually depends on the season and the type of climate you live in.

Koi eat very little or not at all when the temperature falls below 48 degrees F. It’s actually best not to try to feed them when the temperature is this cold because there’s a good chance they won’t eat. The food will rot and contaminate the water.

Believe it or not, the temperature also determines what type of food they should eat in order to facilitate easy digestion. For example, when it’s between 48 and 64 degrees F, the fatty foot is best, especially foods that contain wheat germ.

When the temperature rises above 64 degrees F, koi need more protein, though you should still mix it up with some vegetables and fruit.

Monitor water temperature in the summer months. If it goes higher than 88 degrees F, you really have to monitor feedings and the water chemistry. Temperatures this hot can be stressful for your koi.

When the water gets too hot, it loses some of its ability to carry oxygen, which makes it harder for koi to breathe. To compensate, they breathe faster which increases the ammonia in the water.

You should still feed your koi in the summer but try smaller meals more frequently when it’s at or above 88 degrees F. And pay close attention to the water chemistry.

How Often Should You Feed Koi Fish?

How often you should feed koi also depends on the season.

You might be tempted to start feeding your fish as soon as the coldest winter days have passed but you should never feed them when the temperature is below 48 degrees F. As temperatures start to warm, their metabolism speeds up and they’ll soon be ready to eat.

Start with one feeding per day until they become more active. As it gets warmer, they’ll get more and more active at which point you should feed them twice a day.

In the summer, koi get hungrier the higher the temperature gets. For temperatures between 73 and 77 degrees F, you should feed them four times a day. When it gets above 77 degrees F, feed them five times a day.

As we mentioned, when the temperature approaches 90 degrees F, it’s better to do smaller, more frequent feedings and remember to keep a close eye on water parameters.

As it moves toward fall and the temperature starts to cool, koi become less active and need less food. They’ll swim slowly and lose their interest in eating. Gradually transition from high protein summer foods to high-fat foods during this time.

When it falls below 64 degrees F, begin feeding your koi no more than twice a day. When it gets below 48 degrees, stop feeding them for the winter.

How Much to Feed Koi Fish?

How much food you should give to your koi depends on how many fish you have in your pond and what time of the year it is. To figure out what your koi need, follow the Five Minute Rule. Give your fish as much food as they can eat in five minutes.

After five minutes, any food in the water must be removed. Scoop up what’s left behind and give them a little less with the next feeding.

It’s important to get this balance right but remember that it’s always better to underfeed than overfeeding. Underfeeding can stunt their growth over time but overfeed causes a lot of issues, including accumulation of waste, bacteria, and algae in the water. This all leads to oxygen loss and unhealthy fish.

Conclusion

Koi require high protein foods for energy in the summer when their metabolism is fast and they’re very active. They should eat four or five times a day following the five-minute rule. As the temperature drops, feed them less and less. Below 48 degrees F, stop feeding them for the winter.

Remember, when the temperature approaches 90 degrees F, feed them less food more often and monitor the water parameters carefully. When it gets that hot, less oxygen is available in the water and ammonia levels rise.

There are a lot of things to consider when feeding koi. What you feed them is as important as when and how much.

Reduce Nitrate in a Fish Tank

0

High nitrate accumulation, sometimes referred to as old tank syndrome, can be a common problem for long-time aquarium hobbyists. It usually occurs when regular maintenance and water change routines are ignored. Nitrate is the end product of bacterial reduction of ammonia to nitrite and then to nitrate. The nitrate will accumulate in the aquarium water until it is assimilated by plants or removed by water changes.


In freshwater, nitrate is relatively nontoxic even at high levels (200 mg/L or more), but in saltwater aquariums, it can be a problem for marine invertebrates, so it should be kept at lower levels (below 20 mg/L). Some marine aquarium keepers are reluctant to perform regular water changes to lower the nitrate as they would then need to add more salt into the aquarium, and so they only top off the evaporated water with freshwater (as salt does not evaporate). This does not remove the nitrate, but allows the nitrate to rise and can cause problems in the aquarium. 


This nitrate reduction method is an instant nitrate reduction water change method. You can reduce nitrate quickly to zero with no ill or harmful effects to your established aquarium residents. In fact, the behavior of the tank inhabitants can improve greatly afterward. You may notice the fish will become more active, start eating better, and may display brighter colors within a few days.

 
Fish tank with bright blue fish.
Moto “Club4AG” Miwa/Flickr/CC BY 2.0

Important Considerations

One important consideration before you start a massive (or any, for that matter) water change is to remember that you will also be changing the pH in your tank (probably upward). Before beginning this water change, it is wise to slowly adjust your tank water pH to where it will be when you are finished. You can adjust the pH upward with common baking soda or downward with one of the many products on the market to reduce the pH of aquarium water. This will prevent your tank critters from going through “pH shock,” which can be fatal to more sensitive tank critters.


This method was proven when an experiment was performed to test it. The test tank’s nitrate was allowed to rise to a dangerously high level, literally off the scale, to observe the transitions the tank would go through. The experiment was successful. It allowed the testers to observe the formation of different algae.


The established aquarium residents survived, too; a 15-inch snowflake eel, various types of hermit crabs and snails, a few crabs, two colonies of zoanthids, some non-living corals, and some live rock. The testers even added a newly mated pair of coral-banded shrimp the day after the completion of the water change procedure with no problems at all.


Rapid Nitrate Reduction Method

Many people try to reduce their nitrate levels by performing a series of partial, 20 percent water changes. This will reduce your nitrate (or any other chemical substance) levels, but it is rather inefficient if the object is to reduce the levels to near zero in the shortest period of time as possible, with the least amount of water.


For example, if you reduce the level of water in the tank to 20 percent of normal and then refill the tank to a 40 percent level, you have already reduced your nitrate levels by half. If you then refill the tank to the 100 percent level, your nitrate levels will be 20 percent of the original level that you started at.


If, on the other hand, you reduce the 40 percent water level once more to 20 percent and then refill the tank, you will end up with a nitrate level of 10 percent of what you started with. Perform the 40 percent to 20 percent reduction once more, and you will end up with a nitrate level of 5 percent of what you started with. So, if you started out with a nitrate level of 100 parts per million and used this method, your 100 ppm nitrates would be reduced, in a short period of time, to five ppm, which is considered to be an acceptable level even for corals.

 
Animated GIF of rapid nitrate reduction in an aquarium.
Stan Hauter

Why It Is Safe

Some people fear that the rapid reduction of nitrate would “shock” tank critters. This is an understandable concern, but under the circumstances, the rapid reduction of potentially harmful toxins in a tank is of the utmost importance.


For example, it would be like standing in a closed garage with a car engine running, filling the garage with carbon monoxide. Then imagine someone telling you not to open the garage door since the rapid reduction in carbon monoxide levels is more harmful than reducing the carbon monoxide levels by 20 percent. The scenario is the same. The fish and other tank inhabitants are swimming in a toxic substance that will kill ​based on exposure.


Of course, the best way to avoid the urgent need to have to reduce toxic nitrate levels is to follow a regular maintenance and water change routine. If you find you are in a position where everything you have tried does not seem to work and rising nitrate levels continue to be a problem, give this water change method a try.


You can be conservative while using this method, too. if you are concerned about “shocking” your tank inhabitants, you can always perform this process over a period of time (waiting a few days between each water change process) until the nitrate is reduced.

Gender of Your Fish

0

Depending on the species, determining the sex of a fish ranges from easy to nearly impossible. Knowing the sexual differences in aquarium fish is important when trying to breed fish and also for choosing the proper balance of fish for a community aquarium. Although not all fish can be easily identified by sex, these tips will help you recognize the sex of many of the common species of aquarium fish.

Determining Fish Gender

Here is how you can figure out the sex of common aquarium fish. This is by no means an exhaustive list but it does provide a general overview of the differences between the fish sexes.

Angelfish

Angelfish are extremely difficult to know accurately which is which sex, particularly when they are young. Occasionally fully mature males will show a modest nuchal hump, which is a bump on the head just above the eyes. Don’t count on it being there in every case, though. The best way to establish a mating pair is to purchase a half-dozen immature angelfish and raise them together. When they are mature enough, they will pair off, and you should have at least one breeding pair out of the group. Once they begin mating, it will be quite obvious which one is male and which is female as she will be the one with the ovipositor laying the eggs. The ovipositor is a short tube from the female’s vent that she uses to lay her eggs. It has a rounded tip. The male will use a pointed tube that extends from his vent to fertilize the eggs after they are laid by the female. Both parents will take turns hovering over the eggs, fanning them with their fins to oxygenate them and keep them clean.

Bettas

Bettas are a species of fish that is quite easy to identify their sexes. Males have the long flowing fins and brilliant colors that owners find attractive. Male bettas are the ones usually sold in shops. Females are not as vividly colored and have short, stubbier fins, but some male betta varieties can also have short fins. It is not always easy to find female bettas for sale in pet shops; if you can’t locate one, ask the shop owner or manager if they can order one for you. Male bettas must be kept separate from each other and from the female until she is ready to breed. The male builds a nest out of air bubbles on the surface of the water and then entices the female to lay her eggs under it, wrapping his body around hers to fertilize the eggs as she lays them. He then collects the eggs into his mouth and places them into his bubble nest. After breeding, the male chases the female away and takes care of the eggs and the babies. The female must be removed or she will be attacked by the male.

Catfish

Generally speaking, catfish sexes cannot be distinguished. Many species of catfish have not been breed in captivity. The notable exception is the Corydoras species, which has often been breed in captivity. In the Corydoras catfish, the female is usually a bigger-bodied fish than the males. The males will chase a gravid female (full of eggs) around the tank and then she will lay the eggs on a flat surface, such as a plant leaf, smooth rock, or even the aquarium glass. The males swim over the eggs and fertilize them, then the eggs are abandoned.

Cichlids

Cichlids are such a diverse group that it would take a small novel to give specifics for knowing the difference within each species. While many are not easily differentiated, there are a few rules of thumb that apply to quite a few cichlid species.

Males are often slimmer but larger-bodied than females and are more vibrantly colored. The dorsal and anal fins of the male are more pointed, larger and more flowing than in the female. In many species, the male will display egg-shaped markings on the anal fin known as egg spots. Some males have a bump on the head, referred to as a nuchal hump. Although females can also develop a nuchal hump when spawning, it is never as prominent as that of the male. Typically the dominant male will have a larger nuchal hump than other males.

Although the above general rules apply to many species of cichlids, if you are considering breeding them, do your homework on the specific species before seeking a breeding pair.

Cyprinids

Barbs and other members of the cyprinid family are rather difficult to tell apart. Differences will vary by species, but generally, males are more intensely colored and slimmer than females. Since most cyprinids are schooling fish, one way to obtain a breeding pair is to purchase a group of them. In some species of cyprinids, including goldfish, the males will get small white bumps (nuptial tubercles) on their head, operculum and possibly the spine of the pectoral fins during the mating season. The males will chase the female who will lay her eggs and the males fertilize them as she deposits them. After breeding, usually there is no care of the eggs, and the parents may even eat them if they are found.

Gourami

Gouramis are another species of fish that are not easily identified. Males and females often are similarly colored and shaped. There is, however, one fairly universal sexual difference seen in most gourami species. The dorsal fin is long and comes to a distinct point in males, while females have a shorter, rounded dorsal fin.

In addition, certain species of gourami show color variations between the sexes. The male pearl gourami has a deep red-orange coloration on the throat and breast. The male moonlight gourami has orange to red coloration of the pelvic fins. Like the betta, many gouramis will build a bubble nest, but both the male and female are involved in taking care of the eggs.

Livebearing Fish

Among the easiest of all fish to tell apart are the livebearing fish, such as the guppies, platys, mollies, and swordtails. Males are usually smaller and more colorful than females. They also possess an external sexual organ, the gonopodium, which makes it easy to differentiate males from the females: In the male, the anal fin is rod-shaped, while the female has a traditional fan-shaped anal fin. The gonopodium is used to fertilize eggs inside of the female fish as the male swims alongside the female. The internally fertilized eggs will hatch inside the female and then she will “give birth” to the babies.

Tetras

Tetras do have some differences between sexes, which vary based on the species. The females are a bit larger and plumper than males. Males are often more vibrantly colored and may have longer fins than their female counterparts. Tetras are schooling fish, so breeding pairs can be obtained simply by purchasing a small school of them at one time. Generally, they breed by the males chasing the females and fertilizing the eggs as she lays them in the plants or scattered among the rocks. There is no parental care to the eggs, which may be eaten if discovered by the fish.If you suspect your pet is sick, call your vet immediately. For health-related questions, always consult your veterinarian, as they have examined your pet, know the pet’s health history, and can make the best recommendations for your pet.

5 Best Live Plants for Angelfish

0

Angelfish are one of the most beautiful fish around. Their narrow, slender bodies look amazing darting in and out of long thin plants such as the Amazon Sword and Jungle Vallisneria plants.

In the wild, angelfish (Pterophyllum scalare) are usually found in flooded forests and slow-flowing streams in South America. Their body shape and patterns have evolved to allow them to blend in and camouflage themselves among the plants in their natural environment, which is the main reason they pair so well with live grass-like plants.

It’s important to make them feel comfortable and give them the necessary plants for hiding in an aquarium setting. You can do this by replicating their natural environment and including a selection of live plants for them to swim in and out of.

Any of the below plants can be kept with freshwater angelfish. To create the ideal setup, choose a selection of larger and smaller plants, and plant them so that the fish have plenty of open swimming space towards the middle and front section of the aquarium. Also be sure to surround the back and side sections of the tank with tall plants.

Amazon Sword

Amazon Sword (Echinodorus amazonicus)

The Amazon Sword plant makes an excellent background plant, or if planted alone it can make a great eye-catching central plant. This plant is easy to care for, and usually grows to around 12 inches in height. They have been known to grow up to 20 inches in the right conditions though, so depending on the size of your tank and the strength of your lighting, you may need to trim it regularly. In a low light tank, this plant will grow slowly, whereas in a medium to high light tank, it will grow rapidly.
If you’re planning on breeding angelfish, this is a perfect choice of plant for them because they like to lay their eggs on blades of long leaf plants. If breeding is your main objective, plant an Amazon Sword just behind the middle of the tank, and then plant a taller species behind it to keep the eggs protected and under cover. To plant an Amazon Sword, make sure the roots are anchored well, but leave the crown of the plant above the substrate. The roots of this plant will grow wide and large, so make sure the substrate is 2-3 inches deep. The optimal temperature range for Amazon sword plants is 68-75°F.

Java Fern

Microsorum pteropus

Considering angelfish feel at home in waters where there is plenty of cover from driftwood and leaves, Java Fern is an ideal plant to pair with both driftwood and angelfish. This slow growing plant can be attached to pieces of driftwood around the sides and towards the front of the tank. They can grow in a wide range of lighting and typically the brighter the lighting is, the darker green the leaves will turn.

The leaves are hardy and have a leathery appearance to them. They grow to around 13 inches tall and come in a few different varieties, such as narrow leaf and needle leaf. Both of these variants are ideal for keeping with angelfish due to their thin leaves, which this species of fish loves to swim in between. This plant shouldn’t be buried into the substrate; you’ll need to attach it to something else such as an ornament, decoration, or piece of driftwood. Secure the roots using black cotton thread, and after a few weeks the roots should have attached themselves to the object.

Vallisneria

Aquarium plants - Vallisneria gigantea and Vallisneria spiralis

This is one of the most natural plants to place in an aquarium containing angelfish. It’s low maintenance and very cheap to buy. You simply need to plant a small bunch in one corner and it will quickly create a luscious jungle look in the aquarium. This classic aquarium plant will do well in wide and long tanks, which are also perfect for angelfish. Vallisneria prefers an intense light, however it will still grow even under low light, just at a slower rate.

There are a few different species of this plant available. Vallisneria spiralis, also known as straight vallisneria or tape grass, is the most ideal live plant for angelfish due to its luscious green straight leaves, which look just like tall blades of grass. Other popular species are Vallisneria americana, also known as jungle val and Vallisneria asiatica, twisted jungle val, which has spiral twisted leaves. They grow quickly, and leaves can reach 7-15 inches long.

Anubias Nana

Anubias nana plant in an aquarium

Anubias nana is slightly different from the other plants listed here. Its leaves are shaped differently, more like leaves of a terrestrial plant, and it grows lower in the tank compared to other plants. While this specimen can be planted directly into the substrate, it can also float in the aquarium. This will complement the other taller varieties of plants well. The other species will grow tall and grass-like, providing plenty of cover for angelfish to swim through, while this one makes a great covering for the front of your aquarium.

This species grows quickly, and each specimen should be planted at least two inches apart. Be sure they are not planted in a shaded area as they need light. If you plant any of the other suggested plants, keep those towards the back, and this one towards the front of the aquarium.

Hornwort

A popular aquarium plant - Ceratophyllum demersum

Hornwort can be planted as a background plant, and due to how tall it grows it would make an ideal plant to pair with the Amazon Sword. If you’re planning on breeding angelfish, they’ll need a plant such as the Amazon Sword to lay their eggs on, and you’ll need another taller plant to provide shelter and cover for the eggs. Hornwort is perfect for this. Due to the rapid speed at which this plant grows, you will need to regularly trim it to make sure it doesn’t take over the tank. Plant it in the back and along the sides of the aquarium to make a great background for the other plants.

Written by Robert Woods