Home Blog Page 2

Published on YouTube: Primitive Technology Fish pond setup at backyard

0

Primitive Technology Fish pond setup at backyard
Welcome to Vedha Fish Farm Official! 🌊🐠

Dive into the mesmerizing world of aquariums! 🐟💧 From aquascaping tips and fish care guides to tank setups and exotic aquatic species, we’re here to bring your underwater dreams to life. Whether you’re a beginner or a seasoned aquarist, our channel offers something for everyone who loves the beauty of aquatic life.
#AquariumLife | #FishTankGoals | #FreshwaterAquarium | #SaltwaterAquarium | #Aquascaping | #FishTankSetup | #AquariumLovers | #UnderwaterWorld | #TropicalFish | #AquariumHobby | #PlantedAquarium | #AquariumDesign | #AquariumInspiration | #AquariumVibes | #ReefTank | #BettaFish | #AquariumTips | #FishKeeping | #FishTankIdeas | #NanoAquarium | #AquaticPlants | #AquariumMaintenance | #Tankmates | #DIYAquarium | #AquariumTour | #AquariumAddict | #FishTankBuild | #AquariumDecor | #AquariumCommunity | #FishKeepingTips | #AquariumGoals | #AquariumSetup | #AquariumArt | #AquariumJourney | #FishTankLove | #AquariumCare | #CichlidTank | #MarineAquarium | #AquariumChannel | #ShrimpTank | #AquariumFishCare | #AquariumPhotography | #PlantedTankAddict | #ReefTankAddict | #AquascapeInspiration | #AquariumTutorial | #TankBuildJourney | #AquariumLifestyle | #AquariumIdeas | #AquariumAdventure
💡 What you’ll find here:

Step-by-step tutorials
Expert advice on fishkeeping
Stunning aquascape inspirations
Product reviews & recommendations
Behind-the-scenes of maintaining vibrant tanks
Subscribe to join our community of passionate aquarists and let’s explore the wonders of the aquatic world together! 🌿🌟

About Vedha Fish Farm:
Welcome to Vedha Fish Farm, your trusted destination for everything freshwater aquatics since 2012!

Founded with a passion for freshwater ecosystems and a dedication to excellence, Vedha Fish Farm has been bringing the beauty of aquatic life into homes, offices, and businesses for over a decade. From hobbyists just starting out to experienced aquarists, we’re here to help every step of the way.

At Vedha Fish Farm, we specialize in providing:

A wide variety of healthy and vibrant freshwater fish.
Premium quality aquatic plants to enhance your tank’s ecosystem.
Expertly curated equipment and supplies for every level of enthusiast.
Personalized guidance to help your aquarium flourish.
Our mission is to inspire and support the joy of freshwater aquariums while promoting sustainable and ethical aquaculture practices. With a team of experienced professionals and a deep love for aquatic life, we’re committed to helping you create a thriving, serene underwater world.

Thank you for choosing Vedha Fish Farm as your freshwater aquarium partner since 2012. Dive into the world of aquatics with us and experience the beauty of nature at its finest!

📌 Trending hashtags:
#aquascaping #aquariumlife #fishkeeping #plantedtank #aquariumhobby #aquariums #fishlovers #underwaterworld #aquariumsetup #aquaticinspiration #vedhafishfarmofficial

🌊 Don’t just watch—dive in! Hit that subscribe button and make waves with us! 🌟
#Trending | #Viral | #YouTubeContent | #ContentCreator | #YouTubeLife | #SubscribeNow | #NewVideo | #VlogLife | #DailyVlog | #YouTubeChannel | #YouTubeFamily | #ViralVideo | #InstaFamous | #ContentCreation | #FollowMe | #VideoOfTheDay | #LikeAndSubscribe | #CreatorCommunity | #Entertainment | #Shorts | #Reels | #HowTo | #DIY | #TechReview | #FitnessJourney | #TravelVlog | #Foodie | #CookingTutorial | #MakeupTutorial | #BeautyTips | #GamingChannel | #MusicCover | #DanceVideo | #Motivation | #Inspiration | #EducationalVideos | #ScienceExplained | #Unboxing | #ProductReview | #Comedy | #FunnyVideos | #LifestyleVlog | #Art | #PhotographyTips | #NatureLovers | #TravelGoals | #AdventureTime | #HealthyLifestyle | #WorkoutMotivation | #SelfCare | #Mindfulness | #HomeDecor | #InteriorDesign | #PetLovers | #DogVideos | #CatVideos | #AnimalLovers | #FashionTrends | #OOTD | #StreetStyle | #StyleTips | #RelationshipGoals | #ParentingTips | #FinanceTips | #Investment | #Crypto | #StockMarket | #MotivationalSpeech | #FitnessTips | #WeightLossJourney | #MentalHealthMatters | #TechGadgets | #GamingSetup | #PCGaming | #ConsoleGaming | #MobileGaming | #Streaming | #LiveStream | #Podcast | #BookReview | #MovieReview | #TVShows | #WebSeries | #DigitalMarketing | #SocialMediaTips | #YouTubeTips | #SuccessStory | #GoalSetting | #SideHustle | #Entrepreneur | #SmallBusiness | #StartupLife | #EcoFriendly | #SustainableLiving | #Minimalism | #Meditation | #Yoga | #HikingAdventures | #BucketList
via YouTube https://www.youtube.com/watch?v=2dmbo5QIGT8

Essential Guide to Setting Up Your First Marine Aquarium

0
school of pet fish
Photo by David Clode on Unsplash

Introduction to Marine Aquariums

A marine aquarium is a captivating ecosystem that allows enthusiasts to recreate the vibrancy of ocean life within the confines of their home. Unlike freshwater aquariums, marine environments house saltwater species, which typically include a diverse array of fish, corals, and invertebrates. The allure of marine aquariums stems from their ability to showcase stunning colors and behaviors, creating a dynamic and lively focal point in any space. The distinct types of marine aquariums can be categorized into three primary groups: fish-only, reef, and nano tanks.

Fish-only marine aquariums focus on housing various marine fish species, often emphasizing vibrant colors and distinctive shapes. This type of setup is relatively more straightforward, as it does not require the delicate balance of corals and other invertebrates. On the other hand, reef aquariums demand greater expertise and commitment, as they incorporate live corals, invertebrates, and fish that thrive in symbiotic relationships. These setups aim to replicate a natural reef environment and require more precise water quality management and lighting systems to support coral growth.

Lastly, nano tanks, which typically range from 5 to 30 gallons, appeal to both new and experienced hobbyists. They present a compact option for those with limited space, allowing individuals to create breathtaking marine displays without the need for extensive equipment. Regardless of the type, understanding the basic components and requirements of each marine aquarium is crucial for successful maintenance. Factors such as tank size, filtration systems, lighting, and water parameters play integral roles in ensuring a thriving aquatic environment. This foundational knowledge prepares hobbyists for the exciting journey ahead, setting them on a path towards creating their very own piece of underwater paradise.

Choosing the Right Aquarium Size

When setting up your first marine aquarium, one of the most critical decisions is choosing the appropriate size. Marine aquariums come in various dimensions, ranging from small nano tanks of around 5 to 20 gallons to larger setups exceeding 100 gallons. Each size has its advantages and disadvantages, making it essential to consider your specific requirements and circumstances.

Smaller aquariums, such as those in the nano range, can be suitable for beginners due to their lower initial cost and space requirements. They can fit easily in apartments or smaller rooms, allowing for flexibility in placement. However, nano tanks often have more significant fluctuations in water parameters, making it more challenging to maintain a stable environment for marine life. Additionally, the limited space restricts the types and number of fish and corals you can keep, which may not satisfy enthusiasts looking for diversity.

On the other hand, larger marine aquariums provide a more stable ecosystem due to the increased water volume, which helps buffer against fluctuations in temperature and chemical parameters. A larger setup allows for a more significant variety of marine species, fostering a dynamic and vibrant underwater environment. However, the larger footprint may require a considerable financial investment, not just for the tank but also for associated equipment like filtration systems and lighting. It is also essential to ensure that you have the appropriate space to accommodate such a sizable aquarium.

Before making a final decision on aquarium size, evaluate your budget, the available space in your home, and the types of marine life you wish to keep. For beginners, a tank size of 30 to 55 gallons is often recommended, as it strikes a balance between managing water quality and providing enough room for various marine organisms. By carefully considering these factors, you can select a tank that aligns with your goals and creates a successful marine ecosystem.

Essential Equipment for Marine Aquariums

Establishing a marine aquarium necessitates careful selection of essential equipment that ensures a stable and healthy environment for aquatic life. The fundamental components include filtration systems, heaters, lighting, and protein skimmers, each serving a crucial role in maintaining a thriving marine ecosystem.

Firstly, a reliable filtration system is vital for maintaining water quality by removing impurities and toxins. There are mainly two types of filtration systems: mechanical and biological. Mechanical filters physically strain debris from the water, while biological filters utilize beneficial bacteria to convert harmful ammonia and nitrites into less toxic nitrates. It is advisable to choose a filter with a processing capacity that will handle at least four times the volume of your aquarium per hour for optimal efficiency.

Secondly, maintaining the correct temperature is essential for the health of marine organisms. Heaters, typically submersible ones, are used to regulate and stabilize the water temperature. It is suggested that you opt for a heater with a higher wattage than necessary, as it will work less and extend its lifespan while providing consistent warmth.

Lighting plays a pivotal role in creating an appealing visual atmosphere and supporting the growth of corals and other photosynthetic organisms. LED lighting is highly recommended due to its energy efficiency and adjustable intensity, allowing you to simulate natural daylight cycles. Look for options that allow for color variation, as different light spectrums can enhance the health and coloration of your marine life.

Lastly, protein skimmers are essential for removing organic waste from the aquarium before it can decompose and harm your fish and invertebrates. They work by creating microbubbles that attract and trap organic material. Ensure that your protein skimmer is appropriately sized for your aquarium to ensure maximum effectiveness.

Selecting high-quality equipment often involves balancing performance and budget. Researching brands, reading reviews, and considering second-hand or discounted options can help in obtaining the necessary tools without compromising quality.

Choosing Substrate and Aquascaping Materials

When setting up your first marine aquarium, selecting the appropriate substrate and aquascaping materials is crucial for both the health of marine life and the overall aesthetic appeal of the aquarium. Various types of substrates are suitable for marine environments, each with different qualities and benefits. Two of the most popular options are live sand and crushed coral.

Live sand is often favored for its natural properties. It contains beneficial microorganisms that contribute to biological filtration, improving water quality in the aquarium. This substrate also promotes a more dynamic ecosystem and benefits burrowing fish and invertebrates. Live sand can stabilize water chemistry, which is essential for maintaining a balanced environment for marine species.

On the other hand, crushed coral serves as an excellent substrate for those looking to keep specific types of marine animals, particularly some species of reef fish and invertebrates. Crushed coral has a coarser texture compared to live sand and can help raise the pH levels of the aquarium. This characteristic is advantageous for keeping certain corals and other marine organisms that thrive in slightly alkaline conditions. However, care must be taken to ensure proper water movement, as it may accumulate detritus if not adequately managed.

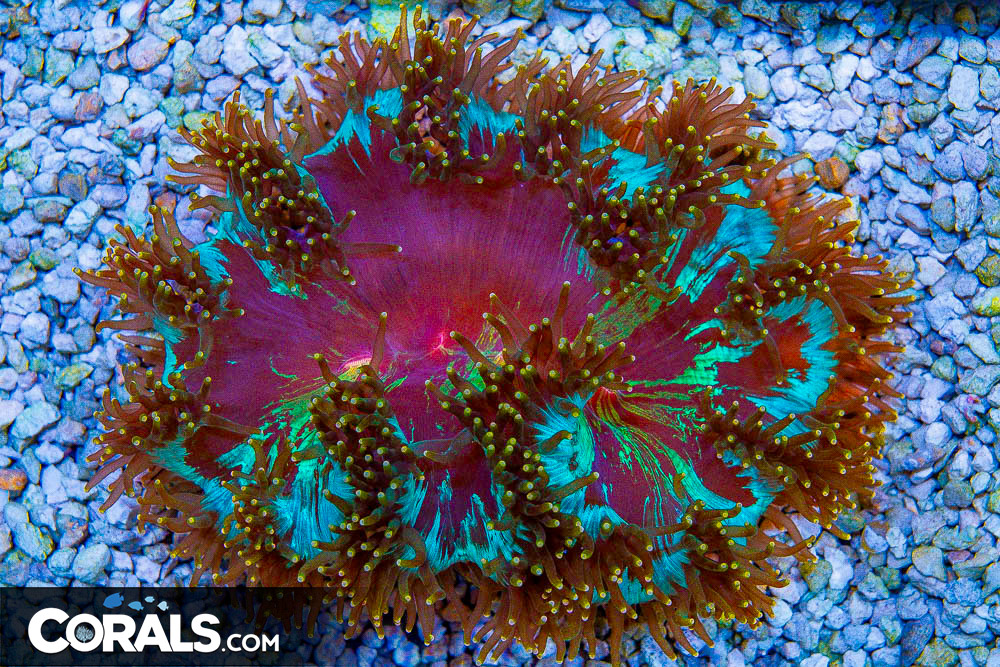
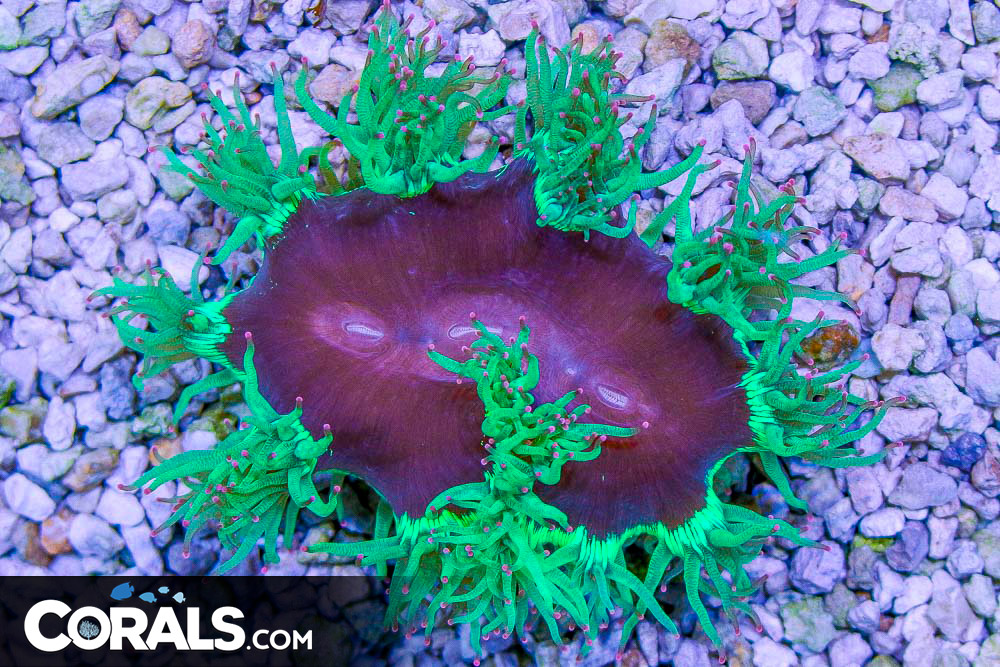
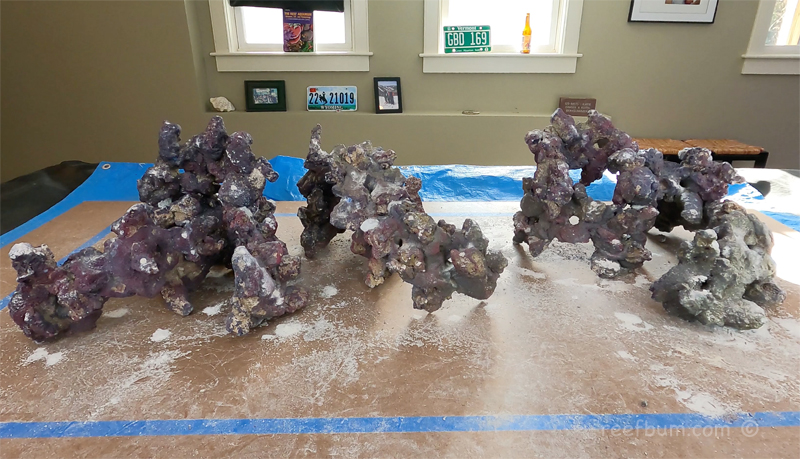
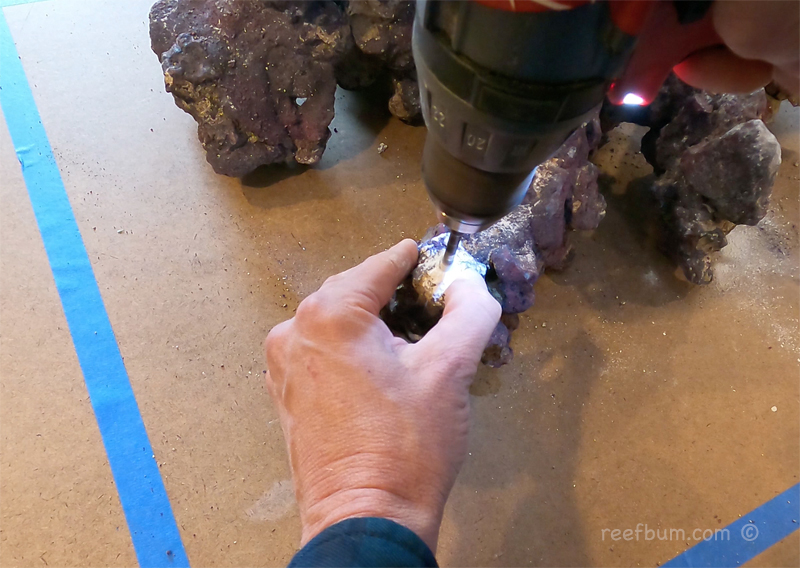
In addition to substrate selection, aquascaping materials such as rocks and corals play a pivotal role in creating an appealing marine environment. Live rock is a popular choice, as it not only serves as a decorative element but also provides a habitat for beneficial bacteria, enhancing the biological filtration process. Aquascaping with various shapes and sizes of rocks allows for the creation of hiding spots and swimming areas for fish. Furthermore, adding corals can contribute to the biodiversity of the tank, provided that they are compatible with the fish species chosen.

When planning your aquascaping layout, consider the swimming patterns of fish and the light requirements for corals. A well-thought-out arrangement will not only enhance the visual aspect of your marine aquarium but also create a healthier, more balanced ecosystem.

Water Parameters and Quality Control

Establishing a thriving marine aquarium requires an understanding of critical water parameters and the importance of maintaining high-quality water. Essential aspects include salinity, pH, ammonia, nitrites, and nitrates. Each of these parameters plays a vital role in the health of marine life, and regular monitoring is crucial for sustaining a balanced aquarium environment.

Salinity is the measurement of salt concentration in the water, typically maintained between 1.020 and 1.025 specific gravity for most marine aquariums. Using a refractometer or hydrometer, hobbyists can accurately measure salinity levels and make necessary adjustments with appropriate salt mixes. Monitoring pH is equally important, as marine organisms generally thrive in a range of 7.8 to 8.5. Sudden fluctuations in pH can stress aquatic life, making it essential to utilize a reliable pH meter or test kit for regular checks.

Furthermore, ammonia and nitrite levels should remain at zero, as these compounds are toxic to fish and invertebrates. Ammonia is a product of organic matter breakdown, while nitrites emerge during the nitrogen cycle. Monitoring these parameters can be done effectively with test kits designed for marine applications. Additionally, nitrates should ideally stay below 20 ppm to prevent algae growth and maintain fish health. Regular water changes and proper filtration can help manage and dilute nitrate levels.

To facilitate effective monitoring, aquarists can employ tools such as water test kits, digital probes, and automated systems that track water quality parameters. These tools not only provide real-time data but also help pinpoint issues before they escalate, ensuring a stable environment for marine organisms. By consistently checking and adjusting these water parameters, aquarium enthusiasts can create and maintain a thriving marine ecosystem.

Cycling Your Marine Aquarium

Understanding the nitrogen cycle is essential for successfully setting up your first marine aquarium. The nitrogen cycle refers to the process through which beneficial bacteria convert harmful ammonia from fish waste and decaying organic matter into less toxic substances, such as nitrites and eventually nitrates. This cyclical process fosters a stable environment crucial for the health of your aquatic life.

To initiate cycling, there are a couple of effective methods you can choose from: fishless cycling and the use of live rock. Fishless cycling involves adding ammonia to the aquarium to simulate the waste produced by fish. This method allows the beneficial bacteria to cultivate without risking the lives of any marine animals. Typically, this process can take anywhere from four to six weeks, depending on the water temperature and the initial ammonia levels.

In contrast, using live rock is another popular method to establish your marine aquarium. Live rock is composed of naturally occurring, porous limestone that comes with its own ecosystem of beneficial bacteria and microorganisms. By introducing live rock into your aquarium, you not only introduce these valuable bacteria but also create a natural habitat that supports marine life. This method may also take four to six weeks, with the added benefit of providing immediate biological filtration.

During the cycling phase, it is important to monitor the water parameters closely. Regular testing for ammonia, nitrites, and nitrates will help you track the progress of the cycle. Typically, you will notice ammonia spikes, followed by an increase in nitrites, eventually leading to the expected rise in nitrates. It is essential to remember that patience is key during this stage. Rushing the cycling process can lead to detrimental consequences for your marine aquarium, including fish fatalities and algae blooms.

Selecting Fish and Invertebrates for Your Aquarium

Choosing the right fish and invertebrates for your marine aquarium is a crucial step that significantly impacts the health and aesthetics of the aquatic environment. Beginners often find themselves overwhelmed by the variety of species available, so it is essential to consider several factors before making a selection. Compatibility is paramount; not all fish species coexist peacefully. Researching the temperament of prospective species can help you avoid aggressive combinations that lead to stress or injury within the tank.

In addition to compatibility, it is essential to consider the care requirements of the chosen species. Some fish, such as clownfish and damselfish, are ideal for beginners due to their hardiness and lower maintenance needs. On the other hand, species like angelfish or butterflyfish tend to have more complex care requirements, making them less suitable for novice aquarists. Understanding the dietary, social, and environmental needs of each species will facilitate a healthier ecosystem within your aquarium.

When selecting fish, also take into account the environmental conditions of your aquarium. Factors such as tank size, water temperature, salinity, and filtration should align with the natural habitat of the chosen species. Invertebrates such as shrimp and snails can serve as excellent additions for beginners, offering unique aesthetics while helping maintain water quality. For example, cleaner shrimp not only add interest but also contribute to parasite control, showcasing how invertebrates can benefit your setup.

In summary, careful planning is essential when selecting fish and invertebrates for your marine aquarium. Prioritizing compatibility, care requirements, and environmental needs will lead to a thriving aquatic environment. Popular choices for beginners include hardy species that are easier to care for, ensuring a smoother experience as you embark on this rewarding hobby.

Maintenance of a Marine Aquarium

Maintaining a marine aquarium is essential for creating a thriving environment for aquatic life. Regular maintenance activities help to ensure water quality, support marine organisms, and prevent algae overgrowth. A successful marine aquarium setup requires a diligent routine, which involves several key tasks, including water changes, equipment maintenance, and routine cleaning.

One of the most critical tasks in aquarium maintenance is performing regular water changes. It is recommended to change approximately 10-15% of the aquarium water weekly or 20-25% every two weeks, depending on the aquarium’s bio-load and water quality levels. By replacing a portion of the water, excess nutrients, pollutants, and waste products can be removed, promoting a healthier habitat for fish and coral. Always use a marine salt mix when preparing new saltwater, ensuring that it is properly mixed and aerated before being introduced to the tank.

Another significant aspect of maintaining a marine aquarium is keeping all equipment in optimal condition. Regularly check and clean filters, protein skimmers, and lighting systems to ensure they are functioning effectively. Replace any worn-out components or bulbs as necessary, as failing equipment can lead to nitrogen cycle disruptions or reduced light intensity, both of which can adversely affect marine life.

Cleaning your aquarium is another vital maintenance task. Regularly remove detritus and algae from the substrate, glass, and decorations using a soft scraper or magnet cleaner. Be cautious not to disrupt beneficial bacteria colonies in your aquarium. In addition to physical cleaning, it is important to routinely monitor water parameters such as salinity, pH, ammonia, nitrite, and nitrate levels. Maintaining these parameters within acceptable ranges is essential to prevent stress or harm to marine inhabitants.

Lastly, developing a maintenance schedule can keep all of these tasks organized and ensure nothing is overlooked. Make a checklist of weekly and monthly tasks, such as water changes, equipment checks, and parameter monitoring. This structured approach will allow you to address potential issues before they escalate, thereby securing a healthy environment for your marine aquarium.

Conclusion and Resources for Continued Learning

Setting up your first marine aquarium can be a rewarding and enriching experience, providing both aesthetic pleasure and a window into the fascinating underwater world. To summarize, the essential steps for creating a successful marine aquarium involve selecting the appropriate tank size, choosing the right filtration system, establishing a stable environment through proper water parameters, and thoughtfully selecting marine specimens that will thrive together. Preparing your aquarium requires dedication, research, and patience, but the payoff can be a vibrant ecosystem that enhances your living space.

As you embark on this journey, it is crucial to continually expand your knowledge and skills. Engaging with various resources can greatly enhance your understanding of marine aquariums. Numerous books are available that cover topics such as marine biology, aquarium maintenance, and species compatibility. Local aquarist clubs often offer workshops or seminars that provide hands-on experience and opportunities to network with seasoned enthusiasts. Online forums and social media groups serve as excellent platforms for sharing experiences, asking questions, and receiving advice from a diverse community of aquarium hobbyists.

Exploring these resources can equip you with vital insights and practical tips that will aid in the ongoing care of your marine aquarium. Whether you prefer in-depth reading or interactive learning through community engagement, there is a wealth of information to support your hobby. Embrace the journey of setting up and maintaining your marine aquarium, as each step is not only crucial for the health of your aquatic life but also for your personal growth as an aquarist. With dedication and continued education, you will create a flourishing marine environment that brings joy and tranquility to your home.

Introduction to Elegance Coral (Catalaphyllia) Care | Reef Builders

0


Elegance Corals, or Catalaphyllia as they are more technically referred to as, are a colorful and unique LPS Coral that have been in our hobby for quite some time. Elegance are native to the Indo-Pacific region and can be found in the sand beds of shallow coastal reefs off the coasts of Australia, Indonesia, Papua New Guinea and Fiji to name a few! 

Despite coming from different countries, they do not vary much in look or coloration like some other corals might! Elegance are known for their fleshy internal bodies, and long flowing, tipped tentacles! Almost like a torch with a fleshy, open, elongated center. Truly unique looking! 

Elegance Corals come in a multitude of colors that make them quite desirable. Their center bodies range from various shades of green, blue, neon, and purple. Including patterns of stripes and blotches that make no two the same, as well as bright, vibrant tentacle tips of either pink, purple, blue, yellow, or orange!

There are two types of Elegance structures: cone bottom and flat bottom Elegance. As their names suggest, cones are singular corals that exist entirely in an ice cream cone-like skeleton. Whereas flat bottom Elegance have a flat wall-like a rectangular skeleton that was once part of a larger colony, much like a wall hammer, for example. In turn, flat bottom Elegance are typically much larger than their cone counterparts and open larger too!

In terms of care, Elegance are generally considered moderately difficult to maintain. They need stable, well-maintained water parameters and conditions to continue to thrive long-term. Elegance Corals thrive best in the following water parameters:

Salinity: 1.025 to 1.026 Specific Gravity

Calcium: 400 to 450 ppm

Alkalinity: 8 – 12 dKh

Magnesium 1250 – 1350 ppm

Temperature: 77-78 Degrees Fahrenheit

However, the most important aspect of Elegance care is proper placement. Elegance can be kept under a wide variety of lighting but must be acclimated gradually. Our Elegance are usually under moderate lighting and PAR. Moderate, indirect, and randomized flow serves them best. Allowing their long, colorful tentacles to sway elegantly in your tank! No pun intended! Place these corals down in your sand bed, as they love to open and sprawl out across it. Be mindful of their longer tentacles, as they can latch on and sting other corals in your tank if too close!

There are some pests to look out for when it comes to Elegance that are usually harmless but can cause damage to the elegance tissue. Certain crabs can burrow into the skeleton of the Elegance, typically where the flesh meets the skeleton, creating a circular tunnel. You may not even know they are there except when the Elegance is closed at night, which is the best time to spot them. The easiest way to remove them is to take a sharp pin insert through the center of the crab and then pluck it out. You may also notice a very bright orange crab that glows under actinics that hangs out on the flesh of the Elegance. Typically harmless, but they do tend to create an incision in the tissue of the Elegance to hide in. They’re usually out during the daylight spectrum trying to catch/steal food and can be manually removed with tweezers. 

Elegance can make for a rewarding addition to your reef tank. Their coloration, and look truly make for a unique LPS coral!


Source link

Aquascaping With CaribSea Life Rock

0


Years ago I tried to start a reef tank with dry rock and I had a terrible experience. It was one problem after another, including dinoflagellates, cyanobacteria and a bacterial bloom. I just couldn’t grow SPS like I had done so with live rock and I vowed to never use dry rock again. The issues stemmed from a lack of biodiversity and microfauna with the dry rock. Additionally, I probably did not dose enough bacteria to build up the biological bed.

With my most recent tank build I had a very quick cycle using live rock from KP Aquatics. The tank has had a couple of hiccups but so far the SPS are thriving. So why would I switch back to dry rock for a reboot of my 187 gallon tank?  One reason is to have a more open aquascape and be able to plant and grow out more SPS.

Creating Interesting Aquascapes with CaribSea Life Rock

With dry rock you can take time sculpting interesting and unique structures out of the water. The rock can be put together with one or more bonding agents such as super glue, two-part epoxy or mortar. Acrylic or fiberglass rods can also be used to create even more extraordinary aquascapes.

A fellow reefkeeper had put together a really cool aquascape using CaribSea Life Rock. He primarily used arches to sculpt an open aquascape with a lot of ledges for frags. A LFS in nearby New Hampshire sold the rock so I decided to take a road trip from my home in Vermont to see it first hand. When I arrived I found the rock submersed in water in a holding tank with other rock. Life Rock does come with some bacteria on it so this particular batch probably had extra bacteria since it was being conditioned in sea water.

I liked the look and shape of the arches so the plan was to buy about 90 lbs. For a brief moment I thought about keeping the rock wet to preserve the colonized bacteria. But I ended up sticking with my original plan to sculpt something unique and decided to dry the rock out and glue some together. Two-part epoxy, Paleo-Bond Jurassic Gel 4540 Reef Adhesive and Insta-set Super Glue Accelerator were all used for the project. The arches locked together very nicely so I didn’t need a lot of the bonding agents.

Minimizing Detritus Buildup

For the first layer of rock the feet of the arches were placed on the bottom of the tank to create some space underneath the rock. This was done to allow for more flow below the rocks and to minimize the buildup of detritus. I ended up creating a wide open aquascape with three different islands of rock. Once the glue cured I drilled a bunch of 1/4″ holes in the rock with some diamond coated drill bits. The holes would make it much easier to securely attach frags and to mount frags at interesting angles. In total I drilled approximately fifty holes.

CaribSea Life Rock

CaribSea Life Rock

Once the aquascape was finished I put it in a 100 gallon Rubbermaid stock tank with mature tank water from my 187 gallon tank (the water was added gradually over a couple of weeks). The plan is to keep the rock in the Rubbermaid with a heater and some power heads for three months to give bacteria time to colonize the rocks. Brightwell’s MicroBacter7  will be added daily to help augment the bacteria population. Ten percent weekly water changes with mature tank water will be done as well.

Overall, I hope to avoid my prior issues with dry rock with this comprehensive conditioning process. Will I become a dry rock convert? Time will tell.

Additional Resources

If you would like some help with a new tank build, including help designing a custom aquarium, or help re-configuring your current setup then you can visit this page for more information. And if you are looking to add some equipment, I do sell GHL, Pax Bellum, Reef Octopus Calcium and Kalk Reactors and Royal Exclusiv products, including Dreamboxes, which is the equipment I use and recommend. I also sell Reef Brite metal halide and LED fixtures as well as Maxspect & IceCap Gyres.

As for additional insights and information, please explore my many other reef tank and SPS related articles as well as my YouTube channel. For an even deeper dive into reef tank care you can check out my Reef Keeping Master Class. This online course is an immersive and one of a kind educational tool designed to help reef aquarium hobbyists build and maintain a beautiful SPS reef tank. The course is a series of video presentations with some supplemental video from my YouTube channel. There are also quizzes to help students retain and understand the information presented in the course.

Need some frags…..I can help with that as well 🙂 Please visit my SPS Frag store to see what is available.


Source link

Best Method For Keeping SPS: Ca Reactor or 2-Part?

0

It is always good to have options and in reef keeping there are usually many available to run and maintain a reef tank.  For instance, you do have choices when it comes to keeping up with the calcium and alkalinity demands of a reef aquarium, especially one that is SPS dominant.

SPS require some form of calcium and alkalinity supplementation since they have calcium skeletons that demand a lot of these elements to grow and do well in a tank.

Calcium Reactor vs. Two-Part

When I started to keep reef tanks, I kept mostly soft corals and began to experiment with SPS only after achieving success with those corals. I used a two-part calcium and alkalinity supplement from ESV and it worked great. As I added more SPS, my calcium and alkalinity demands grew, requiring more of the two-part solution.

Cost can be a downside when using certain two-part solutions for tanks requiring a lot of calcium and alkalinity supplementation. But some SPS enthusiasts swear by it since it is a ready-made and simple to use solution (money can be saved by making your own two part). You will need to calculate the amounts needed and add them manually or via an automated doser such as this one by GHL.

ghl doser 2.1

A calcium reactor is another popular option. How do they work? Tank water is fed into a chamber that is filled with carbonate media. Carbon dioxide is then injected, causing the media to dissolve. The by-product of this reaction is a liquid effluent that has a high concentration of calcium and alkalinity, which is dripped back into the sump or tank.

Calcium Reactors & Low pH

The pH of the effluent coming out of a calcium reactor is low, so usually it is necessary to boost the tank’s overall pH. One way to do this is to use kalkwasswer, a German term for “limewater”. It is a highly concentrated solution of calcium hydroxide in water with a high pH of 12.00+. It is typically used to augment calcium and maintain high pH levels in reef aquariums.

In the past I have used a kalk reactor to dose kalkwasser. Kalk reactors are typically fed by RO/DI water used to replace evaporated water in a tank. The problem here is the amount of kalk added to the tank can vary depending on the evaporation rate in the tank. This can cause the alkalinity to swing, not a good thing. If you use a kalk reactor then make sure it is not connected to an auto top-off device.

One last thing to note about kalk reactors is kalkwasser can be less potent given the constant influx of RO/DI water, which can dilute the solution.

Today I keep kalkwasser in a thirty gallon drum filled with RO/DI water. 8,640 mls of this saturated solution is dosed daily to my 187 gallon tank (total system volume is 386 gallons) via two peristaltic dosing pumps. I use two other pumps to dose 2,400 mls daily to my 225 gallon peninsula tank (total system volume is 349 gallons).

Another option to increase the pH when using a calcium reactor is to use a unit with a second chamber. A second chamber can help by removing some of the dissolved CO2 and also increase the calcium carbonate concentration. This occurs due to the longer contact time with the media in the second chamber.

Additionally, pH can be elevated by dripping the calcium reactor’s effluent into the skimmer pump. The aeration from the pump will help to de-gas some of the excess C02.

My Recommendation

So which method of calcium and alkalinity supplementation do I prefer? Well, in my experience using a calcium reactor is pretty much a “set it and forget it” proposition since the media only has to be replaced every few months. And a large C02 canister can last even longer. Kalkwasser dosing will also reduce the amount of time a calcium reactor has to run so money can be saved on media and C02. Some reef keepers, like myself, do swear by kalkwasser, believing it has almost magical properties with regards to growing SPS corals.

I do like the precision when dosing two-part and the fact that pH is not depressed. But, as I mentioned before, it can be costly if you have a large system with a lot of corals. I would lean towards using two-part on smaller systems under 120 gallons and a calcium reactor/kalkwasser on larger systems with a lot of SPS.

Testing – Why it is Important

No matter which path is taken, it is critical to be diligent and test calcium and alkalinity levels on a regular basis. Calcium in reef aquariums should be kept between 380-450 ppm while alkalinity should be in the 7-11 dKH range. Alkalinity is more important, so I recommend keeping a keen eye on it to keep it stable in order to avoid any large swings and subsequent fading or burnt tips on SPS. My tanks do well between 8-9 dKH so that is my target range.

Finally, consider using a device such as GHL’s KH Director, which can monitor and even control the amount of alkalinity being added to a tank a via a doser or calcium reactor. It produces lab-grade measurements and can generate tests multiple times a day.

Additional Resources

If you would like some help with a new tank build, including help designing a custom aquarium, or help re-configuring your current setup then you can visit this page for more information. And if you are looking to add some equipment, I do sell GHL, Pax Bellum, Reef Octopus Calcium and Kalk Reactors and Royal Exclusiv products, including Dreamboxes, which is the equipment I use and recommend. I also sell Reef Brite metal halide and LED fixtures as well as Maxspect & IceCap Gyres.

As for additional insights and information, please explore my many other reef tank and SPS related articles as well as my YouTube channel. For an even deeper dive into reef tank care you can check out my Reef Keeping Master Class. This online course is an immersive and one of a kind educational tool designed to help reef aquarium hobbyists build and maintain a beautiful SPS reef tank. The course is a series of video presentations with some supplemental video from my YouTube channel. There are also quizzes to help students retain and understand the information presented in the course.

Need some frags…..I can help with that as well 🙂 Please visit my SPS Frag store to see what is available.

Source link

Is Your Fish Stressed During Water Changes? Try This.

0


Sharing is caring!

Performing partial water changes every week or so is an essential part of your aquarium maintenance routine. But even though keeping your aquarium water in good condition and free from toxins is crucial for good fish health, your fishy friends can get pretty stressed out during the process.

This guide explains how you can make those regular water changes much less stressful for your fish. I’ve also included some helpful tips on how to spot the signs of stress in your fish and what you can do to prevent this potentially serious condition from affecting your pets.

Key Takeaways

  • Importance of Gentle Water Changes: Weekly water changes are crucial for maintaining a healthy fish tank but can be stressful for fish. It is essential to handle fish carefully with a soft mesh net, avoid major habitat disruptions whenever possible, and ensure gradual changes in water parameters to minimize fish stress.
  • Recognizing Fish Stress: Stress in fish can be indicated by behavioral changes such as increased hiding, reduced appetite, rapid breathing, or erratic swimming. Long-term stress can weaken their immune system, making them susceptible to bacterial diseases and parasite attacks.
  • Stress-Reducing Techniques: To reduce stress during water changes, it’s recommended to perform smaller, more frequent changes, use a drip system for gradual water introduction, carefully match water temperatures, acclimate fish properly, and use a water dechlorinator and stress coat additives.

Why Do Water Changes Cause Stress?

Close up Siamese fighting fish in fish tank

Although water changes in your fish tank are essential to keep the water clean and safe for your fish, they can cause stress in fish for several reasons:

Handling Stress

If you need to carry out a major water change, such as when taking down your tank for a deep clean or during a house move, you’ll need to move your fish physically.

Handling your fish is extremely stressful for them and should be done as infrequently as possible. Never try to pick up your fish with your bare hands! That’s seriously going to stress them out and could easily end in an accident.

Trying to scoop the fish up in a cup or jug is also likely to cause stress, especially if numerous attempts are needed to catch the fish.

Instead, use a proper fish net with fine, soft mesh to catch and move your fish. Try to avoid chasing the fish around the tank, as that’s sure to stress them. Be patient and allow the fish to settle, carefully nudging them toward a spot in the aquarium where you can get them safely into your net with minimal fuss.

Habitat Disturbance

Pumping water out of the aquarium

When carrying out a water change, you generally need to move tank decorations and disturb the substrate with an aquarium vacuum cleaner to remove fish waste and uneaten food. Although necessary to do a thorough job, all that activity can disrupt the fish’s sense of security and territory.

In addition, some hobbyists like to move their tank ornaments around to provide the fish with a change of scenery and give human onlookers a fresh view of the tank. That’s quite a good idea for fish like bettas, who are territorial and intelligent and need plenty of mental stimulation to keep them happy. However, other fish species can become stressed when their environment suddenly changes or feel exposed without their usual hiding spots. You often get the same effect when you add a new decoration or plants to the tank, so allow a few days for the fish to settle down in their new environment.

Changes in Water Parameters

When you replace some of the tank water during a water change, you alter the chemical composition of the water. Even if you’re diligent about matching the temperature and treating the new water with a dechlorinator, subtle differences in pH, hardness, and other parameters can still occur.

Sudden changes in water parameters will stress your fish, as they are highly sensitive to fluctuations in their environment.

Altered Water Flow and Dissolved Oxygen Levels

When you remove water from the tank and then top it up with fresh water, you can change the water’s flow patterns and oxygen levels. Your fish have adapted to specific conditions, and sudden changes in water flow or dissolved oxygenation levels can stress them.

Take care when replacing your filter system that the outflow doesn’t cause a tidal wave where the water was previously calm. That’s sure to upset your fish, especially those that prefer a slow to moderate current.

Introduction of Contaminants

When adding tap water to your aquarium, always use a dechlorinator product to neutralize the chlorine, chloramine, and heavy metals in the water. If you don’t, you risk poisoning your fish, which will definitely stress them.

What Are the Signs of Stress in Aquarium Fish?

Yellow Dwarf Cichlid

The following are all signs of stress in aquarium fish:

  • Increased hiding, reduced appetite, excessive aggression, or lethargy can all indicate stress in fish.
  • If the fish spend a lot of their time near the water’s surface, gasp for air, and show rapid or labored breathing, that’s a sign of stress, typically related to poor water quality or insufficient oxygen levels.
  • Long-term stress can cause fish to lose their color, appearing faded or pale, while some develop blotches or dark patches.
  • Stress often causes behavioral changes in fish, like abnormal swimming patterns, darting erratically, swimming upside down, and spinning around.
  • If you’ve left the water change for too long, your fish might rub against objects in the aquarium or scratch themselves against surfaces, due to irritation from water quality issues.

Stress is potentially extremely dangerous for fish because it impacts their immune system, leaving the fish weakened and vulnerable to attack by bacteria and parasites.

How To Make Water Changes Less Stressful for Your Fish?

Marine life. Fighting fish floating swimming underwater in fresh aquarium tank.

So, how can you make water changes less of an ordeal for your fish and minimize stress?

Take It Slowly

If you forget to carry out a water change one week or simply don’t get around to doing one until a few weeks later, it’s tempting to change half the water in your aquarium or even more.

That’s not great, as the violent changes in water parameters will stress your fish. In addition, beneficial bacteria colonies develop in established aquariums to help break down fish waste and other organic matter. Large water changes can disrupt these colonies, leading to spikes in harmful substances like ammonia and nitrites until the bacteria can re-establish themselves.

Instead of performing a large water change all at once, I recommend breaking it down into smaller, more frequent ones. This helps keep the water parameters stable, reducing the shock and stress to the fish.

Use Drip Systems

The use of a drip system allows for the very gradual introduction of fresh water into an aquarium, replicating the natural flow of water in streams and rivers. That gradual change avoids rapid fluctuations of water parameters and allows the fish to acclimate more easily to the new water conditions.

Avoid Temperature Shock

A hand measuring water temperature in a fish tank

Temperature shock in aquarium fish happens when the water temperature in their aquarium fluctuates suddenly and significantly.

All fish species, from humble goldfish to glamorous discus, thrive in specific temperature ranges. When the water temperature deviates from this range, it can cause huge amounts of stress and potentially harm or even kill the fish.

So, how can temperature shock affect your fish?

  • Sudden changes in temperature stress fish, weakening their immune systems, leaving them more susceptible to diseases, and causing a general failure to thrive.
  • Temperature influences the fish’s metabolic rate. Rapid temperature changes can disrupt their metabolic processes, affecting digestion, respiration, and overall physiological functions.
  • The water temperature affects the amount of dissolved oxygen the water contains. Warm water holds less oxygen than cool water, so a sudden temperature increase can reduce oxygen levels, leading to oxygen deprivation in fish, which can be fatal.
  • Fish suffering from temperature shock can become lethargic, lose their appetite, or even become agitated or erratic in their behavior.

When carrying out water changes, ensure the temperature of the new water matches the tank temperature. To do that, pre-mix the replacement water and wait until it reaches the same temperature as the aquarium.

Use an accurate aquarium thermometer to double-check the water temperature in the tank before adding it to your tank.

Use Proper Acclimation Practices

If you had to take your fish out of the tank during cleaning and changing some water, don’t simply tip them back into the aquarium! That’s sure to stress your pets. The same applies when adding new fish to your tank.

Float the bag with the fish in the tank for around 20 minutes so that the temperatures have a chance to equalize. Then, gradually add a little bit of aquarium water to the bag over a period of time before releasing the fish into the tank.

Sudden bright lights can stress your fish, so it’s also a good idea to leave the tank lights switched off during acclimation to help reduce stress on the fish.

Watch Out for Signs of Stress!

Throughout the acclimation process, watch your fish closely for changes in behavior that could indicate stress. Signs of stress include rapid breathing, erratic swimming, or loss of coloration. If any signs are observed, slow down the acclimation process.

Dechlorinate Tap Water

changing aquarium water

Tap water contains chlorine or chloramine, chemicals that are extremely dangerous to fish and other livestock. Exposing your pets to untreated tap water could kill them. Sometimes, tap water also includes heavy metals, which are also dangerous to fish.

So, always use a good-quality water dechlorinator to neutralize these chemicals before adding tap water to your aquarium.

Buffer pH

If your tap water has a significantly different pH to that of your aquarium, you might want to consider using a pH buffer to gradually adjust the pH of the replacement water to match that of the tank.

Stress Coat Additives

Many water conditioners include stress-reducing ingredients like aloe vera or vitamin E, which can also promote the healing of damaged tissue. If you’re concerned that your fish get stressed during water changes, adding one of these conditioners can help.

Final Thoughts

Although water changes are essential to maintain a healthy, safe aquarium environment for your fish and other aquatic pets, the disturbance to the habit during vacuuming can be stressful for them. In addition, water parameters can change, and temperature fluctuations can sometimes occur, both of which will stress your fish.

You can prevent fish stress by using gradual acclimation techniques, always dechlorinating tap water before adding it to the aquarium and adding a water conditioner with a stress coat.

Sharing is caring!


Source link

Managing Phosphate in a Reef Tank

0


It is very important to prevent phosphate from accumulating in a reef tank since high levels will stress out corals and invertebrates and feed the growth of unwanted algae. Corals suffer because high phosphate levels inhibit calcification but some phosphate is required for growth so stripping out all phosphate is also not good. Given this fact, I like to keep a “slightly dirty” tank and strive to maintain phosphates within the .03 to .07 ppm range. The same is true for nitrates. I keep them low (~ 2.5 ppm) since high levels can potentially be detrimental to coral growth.

Methods For Controlling Phosphates

There are several ways to control and remove phosphate in a reef tank. A protein skimmer is one tool for removal so it is important to have one that is reliable. Regular water changes is another means for exporting phosphates. I like to change out 10% of my tank water every week. A third method is to set up a refugium, algae reactor or algae turf scrubber and grow macroalgae, a natural method for reducing phosphates.

Number four on the list is use of certain calcium and alkalinity supplements such as kalkwasser. These supplements not only help to maintain calcium and alkalinity in a reef tank but they also elevate the pH. A higher pH may help to bind phosphate to the live rock and substrate and prevent it from leaching into the water column.

Using bio pellets is yet another method of removal that promotes the growth of beneficial bacteria that will feed on both nitrates and phosphates. Bio pellets do have the power to strip too many nutrients out of the water, a downside for sure. Dosing bacteria such as Brightwell’s MicroBacter 7 or CLEAN can also lower both phosphates and nitrates.

Using GFO

Finally, phosphates can be removed by using a reactor with a phosphate binding media such as Granular Ferric Oxide (GFO). Reactors are typically fed by a pump in the sump and circulate water through the media in the reactor. A valve is used to regulate the flow rate through the reactor to optimize phosphate removal. A downside with this method is that some media can release impurities into the water. GFO can also bind and remove valuable trace elements.

You do have to be careful when using a phosphate binding media in an established tank with elevated phosphate levels since sudden removal can shock corals. It is always wise to start off with a small amount of media and gradually increase it over time.

Avoid Adding Phosphates

Removal of phosphate is important but a reef keeper should be careful about inadvertently introducing phosphate to a system. You don’t want to add fuel to the fire. Tap water is a good source of phosphate so it is best to use a RO/DI unit to remove it and other impurities in the water. You also need to be careful about phosphate leaching out of certain types of sand and rock. One downside with dry rock versus live rock is the possibility it might leach phosphates.

Overall, phosphate is very important to reef keeping. Problems will pop up if there is too much or none so it is best to stay on top of it to find that happy balance.

Additional Resources

If you would like some help with a new tank build, including help designing a custom aquarium, or help re-configuring your current setup then you can visit this page for more information. And if you are looking to add some equipment, I do sell GHL, Pax Bellum, Reef Octopus Calcium and Kalk Reactors and Royal Exclusiv products, including Dreamboxes, which is the equipment I use and recommend. I also sell Reef Brite metal halide and LED fixtures as well as Maxspect & IceCap Gyres.

As for additional insights and information, please explore my many other reef tank and SPS related articles as well as my YouTube channel. For an even deeper dive into reef tank care you can check out my Reef Keeping Master Class. This online course is an immersive and one of a kind educational tool designed to help reef aquarium hobbyists build and maintain a beautiful SPS reef tank. The course is a series of video presentations with some supplemental video from my YouTube channel. There are also quizzes to help students retain and understand the information presented in the course.

Need some frags…..I can help with that as well 🙂 Please visit my SPS Frag store to see what is available.


Source link

The 10 Worst Fish Breeding Tips, and 5 Amazing Ones!

0


Sharing is caring!

As an experienced fishkeeper, I can tell you that one of the most exciting things you can do is breed successfully from your fish. But where do you start? There’s so much misinformation out there online that it can be a minefield for newbies to fish breeding.

Experts hope to steer the aquarium fish trade away from taking specimens from the wild environment. Wild fish are often caught with poisons that can damage coral ecosystems and in some cases, numbers are becoming seriously depleted. So, the more successful commercial and home breeding operations are, the better it is for our wild fish.

This article discusses the tenworst breeding tips that seasoned aquarium fish breeders have ever heard. We also explain how to go about breeding aquarium fish the right way!

Key Takeaways

  • Sustainable fishkeeping is promoted by successful home breeding, which lessens the reliance on wild-caught fish, helping to protect natural habitats and fish stocks.
  • Many popular but misguided breeding tips can lead to negative results, such as poor fry survival rates and unhealthy breeding conditions.
  • Expert breeding advice emphasizes the importance of controlled environmental conditions, correct feeding strategies, and avoidance of stress-inducing practices for successful reproduction and fry rearing.

Just Let Them Do Their Thing!

Unfortunately, many amateur breeders recommend allowing nature to take its course and letting the fish do their thing without human help. That rather laissez-faire attitude towards breeding can lead to overcrowding, inbreeding, and neglect of proper care for the fry.

Add More Fish for Better Chances

aquarium with small fish

When setting up a spawning tank, you should include breeding pairs of male and female fish that are in excellent health and spawning condition.

Some people recommend adding a few more fish to your breeding tank, mistakenly thinking that will increase the chance of the fish breeding. However, that approach is counterproductive, as introducing more fish into an established breeding tank can stress the breeding pair and disrupt their breeding behaviors.

Skip Water Changes During Spawning

How Often To Change Fish Tank Water

This terrible tip goes hand-in-hand with the recommendation to allow nature to take its course.

Poor water quality will result if you don’t carry out water changes in your spawning tank. When that happens, the fish might not breed at all, and if they do, their fry won’t be healthy and will likely die pretty quickly.

Ideally, you should change around 20% of the breeding tank water daily, vacuuming away any waste during the process. That prevents fish waste and uneaten food from accumulating in the tank, producing ammonia as it decomposes, potentially poisoning your fish.

Feed Only Live Foods

feeding fish in aquarium

Most fish living in the wild environment eat a varied diet that includes a small amount of algae and plant material. Although feeding your fish live food is undoubtedly good for them, relying solely on those foods can lead to nutritional deficiencies.

Throughout the breeding process and in the build-up to it, feeding your fish a balanced diet of live, frozen, and high-quality dry foods is essential.

Handle the Eggs and Fry Frequently

Some misguided breeders suggest handling the eggs and fry as often as possible. However, excessive handling of eggs or fry causes stress and increases the risk of disease transmission.

Fit a piece of very fine mesh across the tank bottom to prevent the parent fish from eating their eggs. When the eggs are laid, they drop through the mesh and out of the parents’ reach.

However, that approach only works with egg-scattering fish species. If the eggs are deposited on plant leaves or spawning mops, the best thing to do is remove the parent fish so the eggs can develop and hatch safely. In fact, in most cases, it’s best to return the parents to your main tank, leaving the fry to develop and grow in peace.

Of course, there are exceptions, and some fish, such as Kribensis, make very good parents, guarding their young until they can fend for themselves. In that case, you should leave the parents in the spawning tank with their babies.

Keep the Breeding Tank in Total Darkness

Purple Algae in Fish Tanks

Some hobbyists recommend keeping the breeding tank in total darkness to encourage spawning. However, fish need a clear day-night cycle for natural behavior, including breeding.

In the wild, lengthening days and increasing water temperatures tell fish that it’s time to spawn. If you deprive them of light for long periods, the fish won’t breed and could even die.

Use Preventative Medication

Some breeders like to use medications prophylactically to prevent diseases from affecting their fish. However, administering medications without a clear indication can disrupt the delicate balance of the aquarium ecosystem and harm both the breeding pair and their offspring.

Ideally, your fish will be in prime condition before you attempt to breed from them. Provided your spawning tank is clean and correctly set up, you should have no issues with diseases, so preventative medication is not necessary.

Ignore Tank Size Requirements

how many cichlids in a 20 gallon tank

You’ll read many online articles that recommend using a small tank for breeding purposes.

However, breeding pairs need plenty of space not only for spawning but also to accommodate territorial behaviors and allow proper care of the offspring. If the tank is too small, the fish could become stressed, which could lead to aggression and possible injuries. Also, in some cases, a stressed-out parent will eat its eggs and fry; always provide your fish with a large breeding tank.

Mix Different Species for Hybrid Vigor

Hybrid vigor, also known as heterosis, refers to the phenomenon where the offspring of genetically diverse parents show improved growth, health, a longer lifespan, or other desirable characteristics.

Hybrid vigor arises due to the combination of favorable alleles from each parent, leading to increased genetic diversity and overall fitness in the offspring. That’s why crossbreed dogs are currently so popular. Agricultural breeding programs also use hybrid vigor, crossing different strains of wheat, barley, and the like.

However, when it comes to fish breeding, hybridization often leads to unpredictable results and can produce genetically weak offspring prone to health issues. For that reason, breeding should be done within the same fish species whenever possible.

Don’t Worry About Water Parameters

Male hand holding PH tests in front of freshwater quarium

Ignoring water parameters such as pH, temperature, and hardness can lead to unsuccessful breeding attempts or health issues in the offspring and parents.

For that reason, it’s crucial to maintain stable and appropriate water conditions. Ideally, the water parameters should match those in the main display tank, although the water temperature can be a few degrees warmer, as that often triggers spawning.

For example, Indonesian ornamental fish breeder Tom Bowling tried to breed Blotched Anthias for eight months and failed dismally.

Thinking he was doing the right thing, Bowling kept the fish in cool water, attempting to replicate the temperatures these deep-water fish are typically in in their natural habitat. It was only when his air conditioning unit broke, and the water temperature increased overnight by a few degrees, that he realized his mistake. In the warmer water, the fish immediately began spawning!

Top Fish Breeding Tips!

Now you know how not to do it, here are some top breeders’ tips for successful fish breeding.

When’s the Best Time to Breed Fish?

Best Fish To Breed for Profit

As we mentioned earlier, most fish species breed in the spring, when the daylight lengthens and the water gets warmer.

You can mimic this in your home fish tank at any time by increasing the water temperature slightly, leaving the lights on for a little longer each day, and performing more frequent water changes.

Provide both male and female fish with high-protein food and create an environment as close to their natural one as possible, and you will condition the fish to spawn. Different fish species have different egg-laying manners, so you must research the species carefully and provide them with suitable breeding surfaces, plant types, and aquarium setups.

How To Choose a Breeding Pair of Fish?

On tropical fish farms in Asia and Florida, fish are encouraged to spawn in spring, usually indoors. The fry is transferred to outdoor ponds to grow before being shipped to aquarium stores. There’s plenty of live food in the ponds for the youngsters to eat from the start, and they are then offered pellets to promote further healthy growth. The young fish will be well-developed and mature enough to breed by the fall.

Start by choosing fish with no obvious physical deformities, of a good size, and with the best colors.

How to Condition Your Fish for Breeding?

What Everyone Should Know About Breeding Fish

Before you can attempt to breed from your fish, you need to bring them into spawning condition.

  • Give the fish plenty of high-protein food, feeding them more often than you would usually feed your community aquarium fish, ideally several times every day. Live brine shrimp or frozen meaty foods are ideal for this.
  • Provide the breeding pair with their own dedicated spawning tank, set up with the appropriate substrate or decor, depending on the species’ method of egg-laying or livebearing.
  • Most breeders recommend keeping male and female fish separate for a few weeks to increase their likelihood of spawning once they get together. To do that, you can use a glass partition in the tank so that the fish can fully view each other.
  • Increase the water temperature in the breeding tank by a few degrees to around 78o to 82o degrees F, depending on the species. The idea is to have the temperature slightly warmer than it is in your community tank.

Once you’ve done all those things, the female fish will become loaded with eggs or roe. Throughout the conditioning period, you must also keep the pH, water hardness, and alkalinity in line with what’s required by the species for spawning.

How To Produce Infusoria?

One of the biggest challenges facing novice fish breeders is how to feed the fry. You need a food source small enough for the babies to eat, and most aquarists and fish breeders use infusoria as their fry’s first food.

Infusoria are tiny organisms, including bacteria, algae, crustaceans, and protozoa in the water that the little fry can eat.

Growing infusoria is remarkably simple. Just place a lettuce leaf in your breeding tank as soon as spawning is complete. As the leaf gradually decomposes, enough infusoria are created to provide the fry with food for at least their first week. You can then remove the old leaf and replace it with a new one.

Once the young fish have grown enough, you can feed them finely powdered commercially prepared fry food or paste preparations, like Liquifry. After another couple of weeks, you can offer your fish frozen or live foods, such as bloodworms, daphnia, and brine shrimp.

What Size Spawning Tank Do You Need?

Remember, it’s not good practice to keep your breeding fish in a very small tank, as stress can disrupt the spawning process and stress your fish.

Most beginner fish species will do fine in a 10-gallon breeding tank, although larger species will need more spacious accommodation. Equip your spawning tank with a heater, an air pump, and a sponge filter that won’t trap the tiny fry.

Final Thoughts

There are plenty of terrible fish breeding tips out there on the net that you should ignore. In fact, rather than helping the novice breeder to succeed, much of that advice will guarantee that your fish won’t spawn at all!

For breeding success, condition your breeding pairs before adding them to your spawning tank by feeding them a high-quality diet for a few weeks beforehand. Keep your fish in a spacious breeding tank, carry out daily water changes to keep the environment clean and hygienic, and elevate temperature by a few degrees to trigger spawning.

Most fish species will eat their eggs and fry, so remember to remove the parents once the eggs have been laid.

Sharing is caring!


Source link

Using Lanthanum Chloride in a Reef, Too Risky?

0


There are a number of ways to control phosphates in a reef tank. A protein skimmer and regular water changes will help to keep phosphates in check as will bio pellets. You can also use macro algae in an algae scrubber, algae reactor or refugium. Another alternative is Granular Ferric Oxide (GFO) in a media reactor. All of these options were discussed in a prior blog post.

But one option not discussed was the use of Lanthanum chloride. Lanthanum chloride works by binding and exporting phosphate in a reef tank. A number of companies have Lanthanum chloride based products that were designed specifically for use in aquariums.

Tread Lightly – There are Risks

You do have to be careful when using these products so it is very important to read the directions. The key is to not allow Lanthanum chloride to precipitate out into a display tank. A slow drip over time is essential. The product should be dripped into a very fine filter sock (5 – 10 microns). The filter sock acts as a mechanical filter to trap the fine precipitate. If these particles make their way into an aquarium then fish can perish, especially tangs. Fish essentially choke from the lack of oxygen since the substance impacts their gill plates.

Corals can be effected as well if phosphate levels drop too fast. Alkalinity should also be monitored and supplemented since these products will lower that parameter.

Commercial Grade Lanthanum Chloride

An even more aggressive option is to use commercial grade Lanthanum chloride such as the one sold by SeaKlear. This type of product is riskier since it is not meant for aquarium use and does not have specific instructions for that application. However, it can be more economical to use for reef keepers with larger tanks, public aquariums or commercial coral or fish operations.

The bottom line with Lanthanum chloride….be very careful when using the product. It is extremely important to do the necessary homework to become familiar with the pitfalls.


Additional Resources

If you would like some help with a new tank build, including help designing a custom aquarium, or help re-configuring your current setup then you can visit this page for more information. And if you are looking to add some equipment, I do sell GHL, Pax Bellum, Reef Octopus Calcium and Kalk Reactors and Royal Exclusiv products, including Dreamboxes, which is the equipment I use and recommend. I also sell Reef Brite metal halide and LED fixtures as well as Maxspect & IceCap Gyres.

As for additional insights and information, please explore my many other reef tank and SPS related articles as well as my YouTube channel. For an even deeper dive into reef tank care you can check out my Reef Keeping Master Class. This online course is an immersive and one of a kind educational tool designed to help reef aquarium hobbyists build and maintain a beautiful SPS reef tank. The course is a series of video presentations with some supplemental video from my YouTube channel. There are also quizzes to help students retain and understand the information presented in the course.

Need some frags…..I can help with that as well 🙂 Please visit my SPS Frag store to see what is available.


Source link